School Lunch

Josie making salad And now it’s time for everyone’s favorite time of day–even more favorite than the ever present “What’s for dinner?”– Yes.  That’s right: What the heck do you put in your kids’ school lunches!!??

I grapple with this issue mostly with my middle child.  Josie is a very high-brow girl when it comes to culinary delights.  I believe I once mentioned that when asked what she’d like for lunch at school (since her food was coming home practically untouched) her reply was “Ummm… bruschetta please.”

Josie is not a big meat eater, is currently gluten free, and later this month will have braces.  Can you say: food restrictions?  Yipes.  We gotta step up our game here folks.

So I thought about it and decided work with her strengths.  Thank heavens she’s a foodie!  Josie’s auntie gave her a cookbook for Christmas and I have to say, it’s helping quite a bit.  Not only does it give us some good ideas, but as a third grader Josie is now able to prepare most of the items on her own.  This effort, in and of itself, is lending itself to consuming lunch at school.

This is the cookbook we are currently using:

Trader Joe's cookbook I have cleverly blocked out the first letter of a couple choice words in an effort to not give free advertising to this store.  I like Vrader Hoe’s, but I must say they could use a little competition.  Also, while it is darn handy to use ingredients found at a single stop, many of these so-called “recipes” are just instructions for pre-packaged foods.  I mean seriously: some “directions” say “open the frozen food box, put in oven, bake and serve.”  Hmmm… This is not really considered cooking in my opinion… how ’bout you?  But I digress.

In any case, if you’ve got some kiddos old enough to make a go in the kitchen, I do recommend getting something like this.  Libraries carry cookbooks, btw–so don’t get on Amazon if you’re not sure you really need it.

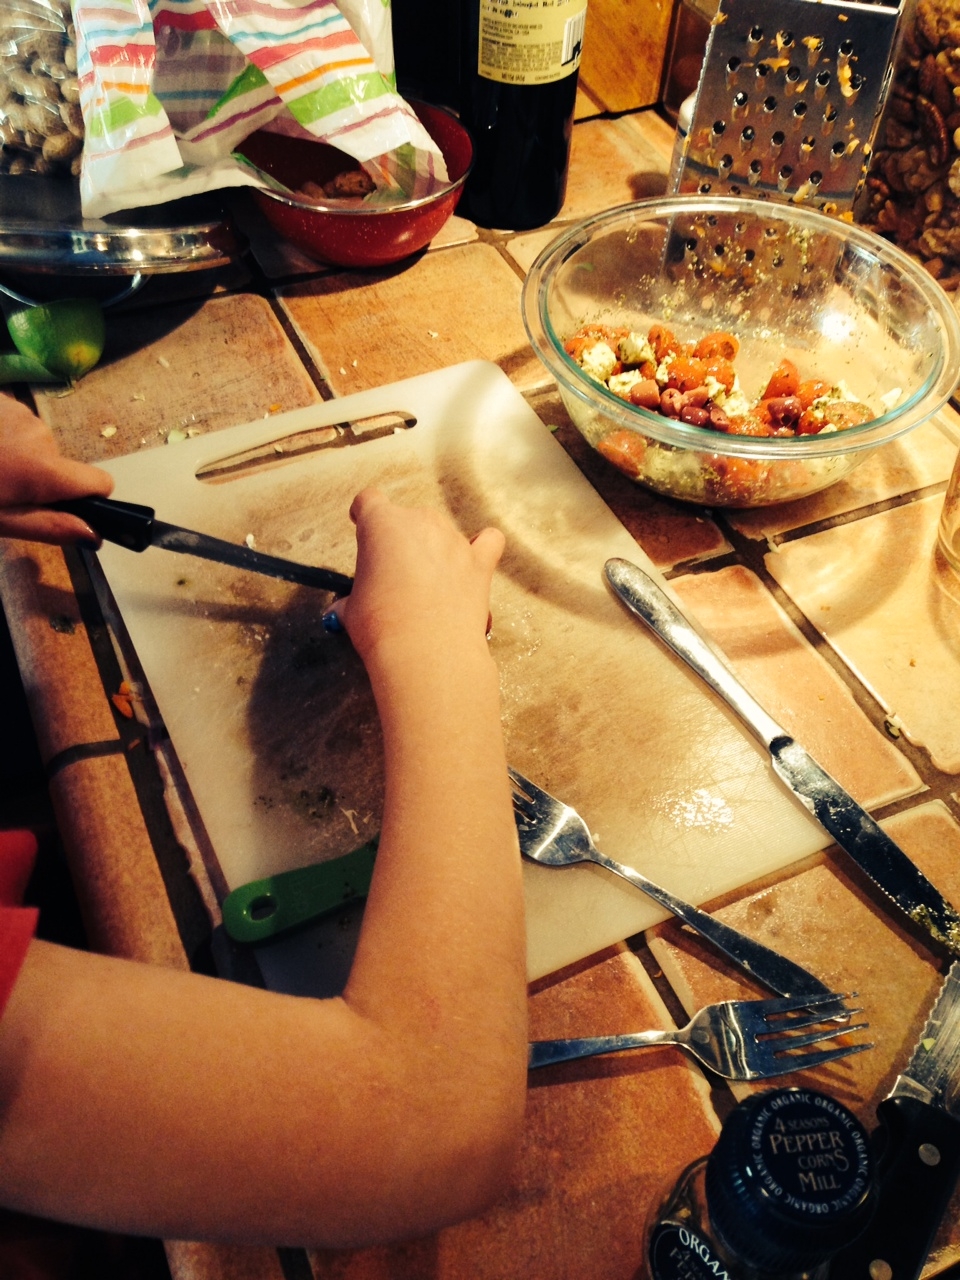
Josie’s Caprese Heaven

Ingredients: 1 cup Ciliegine whole milk fresh mozzarella balls, 1 cup sugar plum tomatoes sliced in half, 2 tbsp. refrigerated Genova Pesto (contains walnuts), a few sliced olives (we like kalamata), pinch ‘a salt, black pepper to taste.

Directions: Mix and serve!

Tip: The original recipe does not contain olives.  After our first taste test, however, both Josie and I agreed that the salad was missing a little something.  “We shouldn’t add any more salt” she said… (Man I love this kid) “I know!  How about some olives?”  It was the perfect choice.  To keep chilled during the school day we place salad into thermos and put in fridge over night.  Serve with some rice crackers on the side and wah-lah!

Best tip of all: She who prepares also cleans up!

Advertisement

Mediterranean Layer Dip

Mediteranean layer dip

I was recently introduced to my new friend, Mediterranean Layer Dip.  Nice to meet you.

I discovered this new delight at our back to school BBQ a few weeks ago.  Let me just say, it was love at first sight when I caught a glimpse of this yum-ola situation.  I literally ran around shouting “Who made that dip!?” until I found the smart lady who had whipped it up.  She didn’t have a name for it so I went with today’s title.

I knew right away what this dip was made of, even though I had never seen it before.  You can just tell that it’s hummus (I used Trader Joe’s Mediterranean blend as recommended), crumbled feta cheese, chopped cucumbers, bell pepper, tomatoes and kalamata olives.  Genius or what!?  Serve with pita chips or more veggies for dipping and you’ve got yourself a beautiful (I mean seriously–isn’t it just lovely?) delicious, hearty appetizer.

Technically the preparation of this food item is more along the lines of “assembly” than “cooking”–which is super okey-dokey right now as it’s so hot in Pasadena I have a hard time choking down my cup of caffeine each morning lately.

I brought this dip (shown here with the gorgeous hand of my girlfriend, Eva, poised with chip) to the Labor Day BBQ that my beans got me invited to.  It wasn’t a big hit with the kids.  My three, for whatever reason, are not hummus fans.  Go figure and it didn’t matter anyway because all the adults huddled around it and snarfed it down so fast we didn’t really feel like sharing with our little offspring anyway.

There are times when generosity is not a priority.

Will I make this dip again?  Invite me over and find out!

I Swear I’m Not Lame!

balsamic glaze

This is not new, but for whatever reason I just met balsamic glaze.  Where have I been?

Balsamic glaze is basically a reduced balsamic vinegar which you can even prepare yourself if you’re feeling Italiana.  It has a malty, rich taste and a syrupy texture that really turns my dial.

And just so you know, I’m not only worried about being labeled “lame” because I’m late to the balsamic glaze party.  The recipe I’m about to share is verbatim a Trader Joe’s sample that I walked by and ate the other day.  What can I say?  Some things you can’t improve and that’s that.

There are two details I would like to point out before I list the recipe.  First of all, you can get balsamic glaze at many markets (aka: this is not a plug for TJ’s!)  Secondly, I’m sure you can make a ton of tasty treats with balsamic glaze, but as fresh ripe summer tomatoes and basil are my best warm weather friends, I haven’t actually experimented with other glazey combos yet.  I just keep making this and we keep shoveling it in and now I’ll tell you how to do it too.

Glazed Caprese Salad (shown here on a summer’s night candle lit table where I ate and drank with some girlfriends who were like recommended bonus ingredients to the whole experience.)

caprese salad

Ingredients: buffalo mozzarella cheese, fresh chopped tomatoes, fresh chopped basil, balsamic glaze, dash of salt

Directions: chop, mix, pour, eat, smile, eat more.

Tips: you may notice that I didn’t list quantities of the ingredients.  It really doesn’t matter and anyway I say grab as much of each item as you can so you’ll have a ton of salad in front of you when you’re finished!  Just drizzle the balsamic glaze a little at a time and stir/taste along the way.  It will mix and dilute with the tomato juices so you’ll need less than you might think.

p.s. I’m back Lisa!

Easy-Peasy Chili

easy chili

OK.  So my girlfriend, Jen, requested I deliver on my promise to post my chili scene before the weather turns.  As she is one of my favorite people on the planet (she helped schlep my kids and even brought me a gorgeous plant when I was on my imagined death bed last month,) this is a request I am happy to accommodate.

Michelle’s Easy-Peasy Black Bean Chili

Ingredients: 2 tbsp. olive oil, 1/2 med onion (diced), 1 clove crushed garlic, 2 med bell peppers (diced–approximately 1 1/2 cups), Two 15 oz. cans black beans (with liquid–don’t drain’em!), One 15 oz. can diced, stewed or crushed tomatoes, One 6 oz. can tomato paste, 1 1/2 tsp. chili powder, salt and pepper to taste.

Directions: Simmer onion (any kind will do,) garlic and olive oil for a few minutes.  Add bell pepper and cook until peppers start to soften.  Add everything else, stir and bring to a boil/simmer until peppers are fully cooked.  You.  Are.  Done.

(OK.  Yes you can top off your creation with shredded cheese, diced onions, sour cream, what have you… Then.  You.  Are.  Done.)

Tips: You can use fresh tomatoes if you have them, but this is the “easy-peasy”  recipe so we’re going with that theme.  Any color bell pepper and any type of onion will do.  This is a mild version so my kids will enjoy it as well.  Often I serve my three little Gringo-mouths first and then add cayenne and chipotle powder or hot sauce to Mike and mine.

You can use other beans besides black (kidney, red, white, pinto) if you like, but I only include the liquid of black beans when I cook.  Any other kind tends to have that viscous water-ish situation that I prefer to drain.   It grosses me out.  What can I say?  So, if you use red or another type of bean, you’ll need to add water.

Meat (chopped leftover cooked chicken or cooked sausage, ground beef) can also be added to this recipe, but even my meat-and-potatoes husband found this version satisfying from the get-go.

Besides the obvious ease with which this meal is created (it literally takes me 10 minutes start to finish), I love how healthy and tasty this chili is.  Legumes baby!!!!

My final fave thing about this recipe is the variety of simple ways I can use it to make different meals.  There are soooo many ways, in fact, that I’m going to don this week “Chili Week!”  Tune in all week to see all the easy-peasy-tasty-healthy ways you can make this meal for your family too!

I usually double or even triple/quadruple this recipe, freeze or share with someone I love.

For today, we’ll go with two chili thingies:

Michelle’s fave: Chili with crushed tortilla chips on top (Hey–how did that beer get in the photo!?)

chili with chips

And we also like our chili with cornbread.

chili with cornbread

I usually use Trader Joe’s cornbread mix, and substitute buttermilk for regular milk.   Super yum.

What else can a mama do with chili?  Baby, just you wait…

Pre-Summer Quinoa Salad!!

Lisa's salad

There are three things you should know about this salad.  First of all, I’ve never actually made it myself.  It’s not my fault though!  Lisa keeps making and making it and bringing it over…  When or why would I go to the trouble?

The second thing you should know is that this recipe comes from another blogger, Once Upon a Chef that Lisa says “is a lot like me.” (Sounds like a cool lady, huh?)

The third thing you should know is that not only do I love this salad soooo much, I love tons of salads like this.  This, friends, is my kinda bowl of yum to have in the fridge.  It’s a pretty complete meal, it’s de-lish, you can prep large quantities at a time and then grab a spoon for days… I’m smiling already.

So I’m telling you all this to tantalize your taste buds.  There will be more salady-posts coming your way as summer (SUMMER!!!) approaches.  Aren’t you excited now?  Boy-oh-boy-oh-boy!

Quinoa Corn/Tomato/Lime Salad (you can read the recipe here, on my recipe page or you can check out the blog from whence it came–nothin’ like options!)

Ingredients

  • 2 tablespoons extra virgin olive oil
  • 1/2 cup chopped yellow onion, from one small onion
  • 1 cup pre-washed quinoa (if not washed, follow package instructions for rinsing)
  • 1-2/3 cups low sodium vegetable broth
  • 1 teaspoon salt, divided
  • 1 cup chopped tomatoes, from 2 medium tomatoes
  • 1-1/4 cups fresh cut cooked corn, from 2 cobs
  • 2 scallions, white and green parts, finely sliced
  • 1 small jalapeño pepper, seeded and finely chopped
  • 1/3 cup chopped fresh cilantro
  • 2 tablespoons lime juice, from 1 large lime
  • 1 avocado, cut into bite-sized chunks

Instructions

  1. Heat 1 tablespoon olive oil in a medium sauce pan over medium-low heat. Add onions and cook, stirring frequently, until soft and translucent, about 5 minutes.
  2. Add quinoa to onions and continue cooking, stirring constantly, for 3-4 minutes. Add vegetable broth and stir in 1/2 teaspoon salt. Turn heat up to high and bring to a boil. Cover pan tightly with lid, turn heat down to low and simmer for 17-20 minutes, until liquid is absorbed and quinoa is cooked. Transfer cooked quinoa to mixing bowl and chill in refrigerator.
  3. When quinoa is cool, add remaining tablespoon olive oil, tomatoes, corn, scallions, jalapeno, cilantro, remaining 1/2 teaspoon salt and lime juice. Taste and adjust seasoning if necessary. Right before serving, scatter avocado chunks over top.

Tip: So far, every time Lisa has made this we get so distracted with the kids (gossip, whatever) she has forgotten to put the avocado in–but it still tasted heavenly.

Tip #2 (unrelated to quinoa salad, but still good to know…): If you’d like to check me out all week on Hometown Pasadena, well, go right ahead.  My featured March recipe is fajitas !!!

Winter Salad

I know I use the word “love” excessively when I talk about food, but, well, I really do love a good salad!

In my humble opinion, a “good” salad should contain a variety of textures and colors and be filled with seasonal produce, when possible, that combine to make interesting and varied flavors.  If you are looking for the iceberg lettuce and ranch dressing, you can stop reading this post now.  If you’d like to tantalize your taste buds (oh my!) and whip up something delicious and nutritious, keep reading…

For a southern Californian, it is easy to make fresh salads year round.  But what’s a meal maker to do if it’s January and one happens to live in, for example, Otisville, MI?  Don’t despair, Michigander amigas!   It is still possible to make a decent winter salad, even if you live in the temporary tundra.  You likely won’t be hitting the farmers market this weekend like I will, but I think you’ll find most of my suggestions at super market near you.

If I use leafy greens, I always start with something dark.  For this salad I used spinach.  You know those fancy restaurants that serve salad sculptures precariously balanced on plates with artsy looking leaves and stalks so large that even a muppet could fit in his mouth?  I hate that.  I like my salad to be easily poppable into my mouth.  You can use a knife or, my fave time saver, poultry shears.  Snip, snip, done!

cutting greens

I chopped up some carrots, celery, cucumbers and then cabbage.  I especially like the striking contrast between the bright white-ish cabbage and the dark spinach.  I do say it is a quite a nice visual, don’t you agree, Dah-ling? (see photo below)

In the summer, there’s nothing (NOTHING) better than a ripe red tomato in a salad.  But in the winter there’s nothing (NOTHING) more disappointing than a white, cakey tomato in a salad.  Don’t do it!  Yes, you need something acidic to make your salad truly del-ish, but there are many better winter options than a lackluster tomato! Even with So-Cal’s year round produce scene, options are still seasonal.   Try a tart apple, fresh or canned sliced pears, or what I used in this bowl of yum: some fresh oranges.

Another winter salad secret of mine is craisins.  Yum!!!  These tart and tangy little garnet gems (they seriously do look like jewels, don’t they?) are the perfect complement to my almost-done masterpiece.

craisins

My kids are well-trained (hello–I hope so!) to eat a good salad, but prefer it without cheese or red onion.  So I usually toss theirs with a balsamic vinaigrette, serve them, and then add the rest for the grownups.  I adore thinly sliced red onion in pretty much any kind of salad, and I also like a dash of cheese.  In this salad I used a mild and salty crumbled feta.  Parmesan or goat cheese could also have worked.   If I use pears, I sometimes like a mild blue cheese.

People who enjoy my salads often get annoyed when they discover that I usually mix the dressing right on top as I go.  “How can I recreate that Michelle!?”  I like a few dashes of balsamic vinegar, olive oil, garlic salt, pepper, sugar, sometimes mustard, sometimes honey, sometimes apple cider vinegar, sometimes celery salt…  (Sorry.  That’s not helpful; it’s annoying.  I think you get the picture…)

I promise to post some actual salad dressing recipes soon.  Honestly, though, when you’ve got so much good stuff in your bowl, a simple vinegar and oil (my general go-to) dressing from a bottle can do just fine too.

Drum roll please… Tah-dah!

salad

Some tips: Add the juice from oranges or pears to the dressing: yum!  This salad was served as part of a meal, but you can make your salad the main dish by adding some protein and maybe some bread or crackers on the side.  My preferred protein pals include chopped chicken, chickpeas, kidney beans or fresh nuts (walnuts, pecans=smile.)  Candied nuts taste marvy, but pack on the calories, so I usually just use plain.

Get creative with your salads.  My mom likes chopped cauliflower and broccoli in hers.  Sometimes we don’t even include lettuce or other leafy greens.  Gasp!  I know.  Shocking.