Winter Cole Slaw

cole slaw 2 OK.  Yes.  I have posted my recipe for cole slaw before.  I just had to do it again because delicious fresh cabbages  literally abound at local farmer’s markets right now!  The high vitamin C and sulphur content in cabbage gives it strong detoxification properties.  High in vitamins and fiber, low in cost and de-lish make it a winter winner at our house.  This recipes forgoes the all-too-common-and-very-unhealthy ingredient of mayonnaise.  Fear not! After you taste this cole slaw you’ll never reach for a jar of that white stuff again.

Ingredients: 1/2 head cabbage (green, red or a combination), chopped; 1-2 carrots, shredded; few slender pieces red onion (don’t need to much); 1/4 cup cider vinegar; 1/4 cup olive oil; 2 tbsp sugar; few dashes salt and pepper

Directions: While you are prepping the veggies, bring the vinegar, olive oil and seasonings to a boil on the stove top.  With the sugar in there this will happen in about 2 minutes, maybe less.  Mix your now kinda-syrupy and warm vinaigrette and pour it over the top of your naked veggies.  Toss all this yummy stuff together and you’re pretty much there, my friend.

Kinda important tip: This recipe tastes great after hanging out in the fridge over night.  This month’s photo includes a double batch of the recipe above.  Why?  Because it gets even better after a few more days… leftovers = YES!!

Not as important tip: I usually give a big batch a stir after several hours to make sure all the vinegar-oil mixture doesn’t rest on the bottom.  Pairs well with chicken, burgers, tastes great on tacos–have fun!
Final thought.  Still with me?  Doesn’t this salad look absolutely gorgeous!?  OK.  Now go get something else done.  Seriously.

Advertisement

Tortilla Soup

tortilla soup As promised, welcome to my tortilla soup.

OK.  So, like most of ya’ll, we have some family traditions this time of year.  Besides the more-people-than-places-to-sit type celebration which is the only way I know how to give thanks in November, one of my favorite traditions is making tortilla soup with the turkey leftovers.

Now my dad is Mexican and nothing would please me more than to say that I will soon be revealing my Grandmother’s family recipe from the hills of Tabasco.  Unfortunately that is not the case.  Nope.  This is because like in most homes, it was my mother’s culture that influenced our meals.  I think my mom–Michigander of German descent–found her tortilla soup recipe in a magzine years ago.  I will say this: we have altered and, dare I say, perfected the recipe.  (Yes.  I dare.)

You can go to 20 Mexican restaurants and have tortilla soup served 20 different ways.  I actually don’t order it out any more because, well, I like my Michigander-German-descent-from-a-magazine-but-now-doctored-up-just-right concoction just fine.  Before reading on, don’t be intimidated by the seemingly long list of ingredients.  There’s nothing too exotic in here, which is yet another reason to love it.

Michelle’s Tortilla Soup

Soup Ingredients: 1-2 lbs chopped chicken, turkey or beef, 3 tbsp. olive oil, small can diced chilis, 2 medium chopped onions, 2 diced red bell peppers, 2 cans drained black beans, 28 oz. can chopped tomato w/juice or a few diced fresh tomatoes, 6 cups chicken/turkey/or beef broth/or a combination of meat broths, 1 can tomato sauce, 1-3 tbsp. cumin, 1-2 tbsp. chili powder, 2 tbsp. worchestershire, 3 cloves garlic, salt and pepper to taste. 

Toppings: diced green onion, diced fresh cilantro, shredded cheddar cheese, sour cream, corn tortillas cut into squares, tortilla chips

Directions: If the meat is raw, cook it in the oil with the onion, bell peppers and garlic.  If meat is cooked, put it aside while cooking onions, peppers and garlic.  Then add all other soup ingredients (including the meat), bring to a boil and then let simmer on low for about 45 minutes.  If possible, make this a day ahead of time, refrigerate and then reheat.  Chilling the soup and then warming it back up helps all the yumola flavors really get to know one another.  That said, it can be really hard to wait to eat this soup!

Regarding the toppings, Mike loves his tortillas to get heated up with the soup so they get sort of melded into his steamy bowl.  I actually just like a few crunchy tortilla chips on top with the cilantro and onion.  You do what works for you. K?

Tips: I made this batch of soup with a bone broth I made for 36 hours in the crock pot after Thanksgiving.  It. Is. So. Good. Oh; this recipe is pretty mild so my kids and mother can eat it.  You can also add diced jalapenos to the soup and/or include some spicy salsa on your list of toppings.  Final tip = don’t worry about quantities in this here recipe too much.  If your soup is too thin, add more toppings.  Done. 


Quinoa Love

Couscous w cumin Pronounced “Keen-wah” (I’ve heard a few variations…!)

I have been loving my quinoa situation recently.  Quinoa seeds are referred to as “grains” (even on the package!) which pretty ridiculous.  They are technically a seed.

With one child gluten free, a house full of hungry people who, like, wanna eat three meals a day plus snacks (what the?) and a mama who doesn’t like to reach for prepackaged junk on a regular basis, salads like this have become a necessary staple.  For example, when my 6 year old son eats snacks like many kids his age eat a full meal, I gotta be prepared.  I just don’t like to see him motoring through an entire sleeve of crackers. “Yes my love.  You can have a few crackers.  But first eat this bowl of something actually healthy if you don’t mind.  Thanks!” (and then, when you’re done and feel full you may forget about the crackers which is fine too…)

Quinoa is a very malleable ingredient, and likes to take on the flavors of whatever else you put with it.  It is high in protein, and tastes super yummy if you ask me.  I created this recipe after finding a few quinoa salad options online.

Michelle’s Cumin Quinoa Salad

Ingredients: 2 cups quinoa, 3 1/2 cups chicken or veg. broth, 1/2 chopped onion, 1 can drained black beans, 1 cup of corn, 1/2 bunch chopped cilantro, 1-3 tbsp. cumin, juice of 1-2 fresh limes, 4 or so tbsp. olive oil, salt and pepper to taste.

Directions: Cook onion with a little olive oil until onions turn translucent (5 mins or so.)  Then toss in quinoa and stir with onions for a few minutes before adding broth.  Then follow package instructions but modify the liquid quantity (they always call for 2 parts water per 1 part quinoa but this will be mushy.)  After quinoa chills add the other ingredients.  Serve with tortilla chips if you like.  Oh!  We sometimes add fresh avocado too… delish!

Tips:  If you make a large amount, just add the avocado when served or it will turn brown and you will make a bad face when you see it later.  Some of the ingredient quantities are broad, above.  This is because it really can vary depending on how much juice you get from a lime or how much you like cumin.  I love the cumin/lime combo, so I go heavy on it.  But you do what you like and I won’t judge.

Final tip: My kids don’t all love this salad.  They like it OK, but it’s not really offered as an—ahem–option.  When they’re hungry (and eyeing the crackers they really want or whatever) they are motivated.  If you are still scratching your head as to how to get your kids to eat something like this, I can recommend a really great workshop…

Texas Caviar

Texas caviar OK.  So seriously: how beautiful is this salad!?

I LOVE this photo.  Texas caviar, as it is called, has been around for a while.  I’ve had it before .  Actually my friend Shandy makes a mean one and she sent me the recipe but I couldn’t find the dang thing so I got on line and found multiple methods of creating this delicious, nutritious, gorgeous–and VEGAN– salad.

I’ll get Shandy’s recipe one of these days but it actually helped to look around in blog-recipe-land because it quickly became clear to me that there are so many variations of this delight, I am pretty much always assured to have something on hand that will work.  Whew!  What a relief as I really liked it and look forward to making it again.  Rhea, my 9 year old gobbled her bowl of Texas Caviar right up.  Josie and Gray were not as excited but with the right motivation rose to the occasion.  (I served this with some tortilla chips on the side and let them scoop some of the salad up–I tell ya: we have so much fun at our house!)

Michelle’s Texas Caviar

Ingredients: 1 cup of shelled and cooked edamame, 1 cup cooked corn, 1 can black beans drained, one can pinto beans drained and rinsed, 1 diced bell pepper, 1/4 cup diced red onion (I soaked mine in ice water for 5 minutes to take the “bite” out), juice of one fresh lime (ream that little guy and get every last drop out!), 3 tbsp. olive oil, 1-2 tbsp white wine vinegar, 1 tbsp. cumin, dash of sugar, salt and pepper to taste.

Directions: mix it up and eat it!

Tips: The key to the flavor situation is the lime juice and cumin.  LOVE that combo.  Depending on how much juice you get from your lime–and then how much flavor that juice has–you may need more or less vinegar.

Other ingredients that I could have also added include, but are certainly not limited to: cucumber, jicama, tomatoes, diced carrots–heck the list goes on and one.  I will try to get some jicama in there next time as it seems like it’d soak up all those flavors real nice.

Acknowledgement: pretty much every recipe for Texas Caviar that I found that was actually made by what appeared to be a real Texan contained black eyed peas.  Being a Minnesota transplant currently residing in Pasadena, CA, I, uh, didn’t have those on hand… sorry!  Go Lone Star State!

Real Time Teriyaki Turkey Sandwiches

teriyaki sandwich done

So I still have leftover turkey (can I get an “Amen, sista!”) and by “real time” I mean that I am, in fact, making these sandwiches right now.  it is 10:30 in the morning and if you think this is a strange time to be making dinner, you obviously haven’t attended my Meal Planning 101 Workshop. 🙂

Teriyaki Sandwiches (could also be made with chicken, pork or beef but I got turkey so there)

Ingredients: 1 tbsp. olive oil, 2 diced stalks of celery, 1/2 diced med. onion, 2 cloves garlic, 1 diced bell pepper, diced left over turkey, 2-3 tbsp. balsamic vinegar, 2-3 tbsp. soy sauce, 1/4 cup or so brown sugar.

Directions: Place oil and onion on stove top and cook at med/high heat till onions turn a bit translucent (about 5 mins.)  Add celery, garlic, bell pepper.  Mix and let simmer until the other veggies begin to soften (another 5 or so mins.)  Then add 2 tbsp. vinegar and soy sauce and most of the brown sugar.  Mix, cover and set heat on low so the veggies can really cook down and soak up all that yummy sauce.

When veggies are cooked, add your diced meat, stir and heat for a few minutes.  Taste and add soy sauce, vinegar or brown sugar as needed.

I was feeling very snappy whilst simmering away this morning, so if you are a visual learner, here are some photos for you:

teriyaki sandwich 1 Here are the veggies getting started.  Aren’t they gorgeous?

teriyaki sandwich 3 And here are our veggie friends after they’ve been reduced a bit and tossed together with the meat.  I wish you could smell this photo…

teriyaki sauce Finally, these are my good friends, teriyaki sauce ingredients (aka: brown sugar, balsamic vinegar and soy sauce.)  For a simple teriyaki sauce situation I use the the 2-3 tbsp. soy/vinegar plus a 1/4 cup loose packed brown sugar, then adjust to taste.  If I need more liquid–like if I’m making stir fry over udon noodles or something like that–I sometimes toss in a splash of orange juice or a little meat broth.

I plan to serve these guys on whole wheat buns for dinner, but it would be also be delicious on rice or a baked potato!

Savory Rice

Rice with turky broth

So my late-summer turkey craving needed a side kick, or side dish I guess.  Enter: savory rice.

I have read about the many health benefits of both brown and white rice, and I cook same as I vote: straddling the fence with compromise in mind.  We’ve had white rice a few times recently so I decided to go with brown for this recipe.  I chose wisely.  It was super tasty and just the right partner for my September turkey–savory and rich tasting, but not too heavy as it’s still warm ’round these parts.

Michelle’s Summer Savory Rice

Ingredients: 2-3 tbsp. olive oil, 1/4 chopped onion, 2 cloves pressed garlic, 1 cup diced carrots, 2 stalks of celery diced, 3 cups brown rice, 6 cups chicken broth.

Directions: Rinse brown rice and drain.  Meanwhile, place olive oil and onion in pot on stove top at medium heat.  Heat for three minutes or until the onions begin to become translucent– I love when that happens), add everything except the broth to the pot.  Stir it all up till the carrots, celery and rice start to cook a bit/get a tad brown from the heat.  Then add the broth, bring to a boil and reduce hit to simmer until all liquid is absorbed (about 30ish minutes.)

Tip: This is a ton of rice, even for my hungry crew.  All part of my master plan as two days later I put it all together and made turkey soup!  Wanna know more about that?  I’ll tell ya soon.  Promise!

Let’s Talk Turkey

cooked turkey

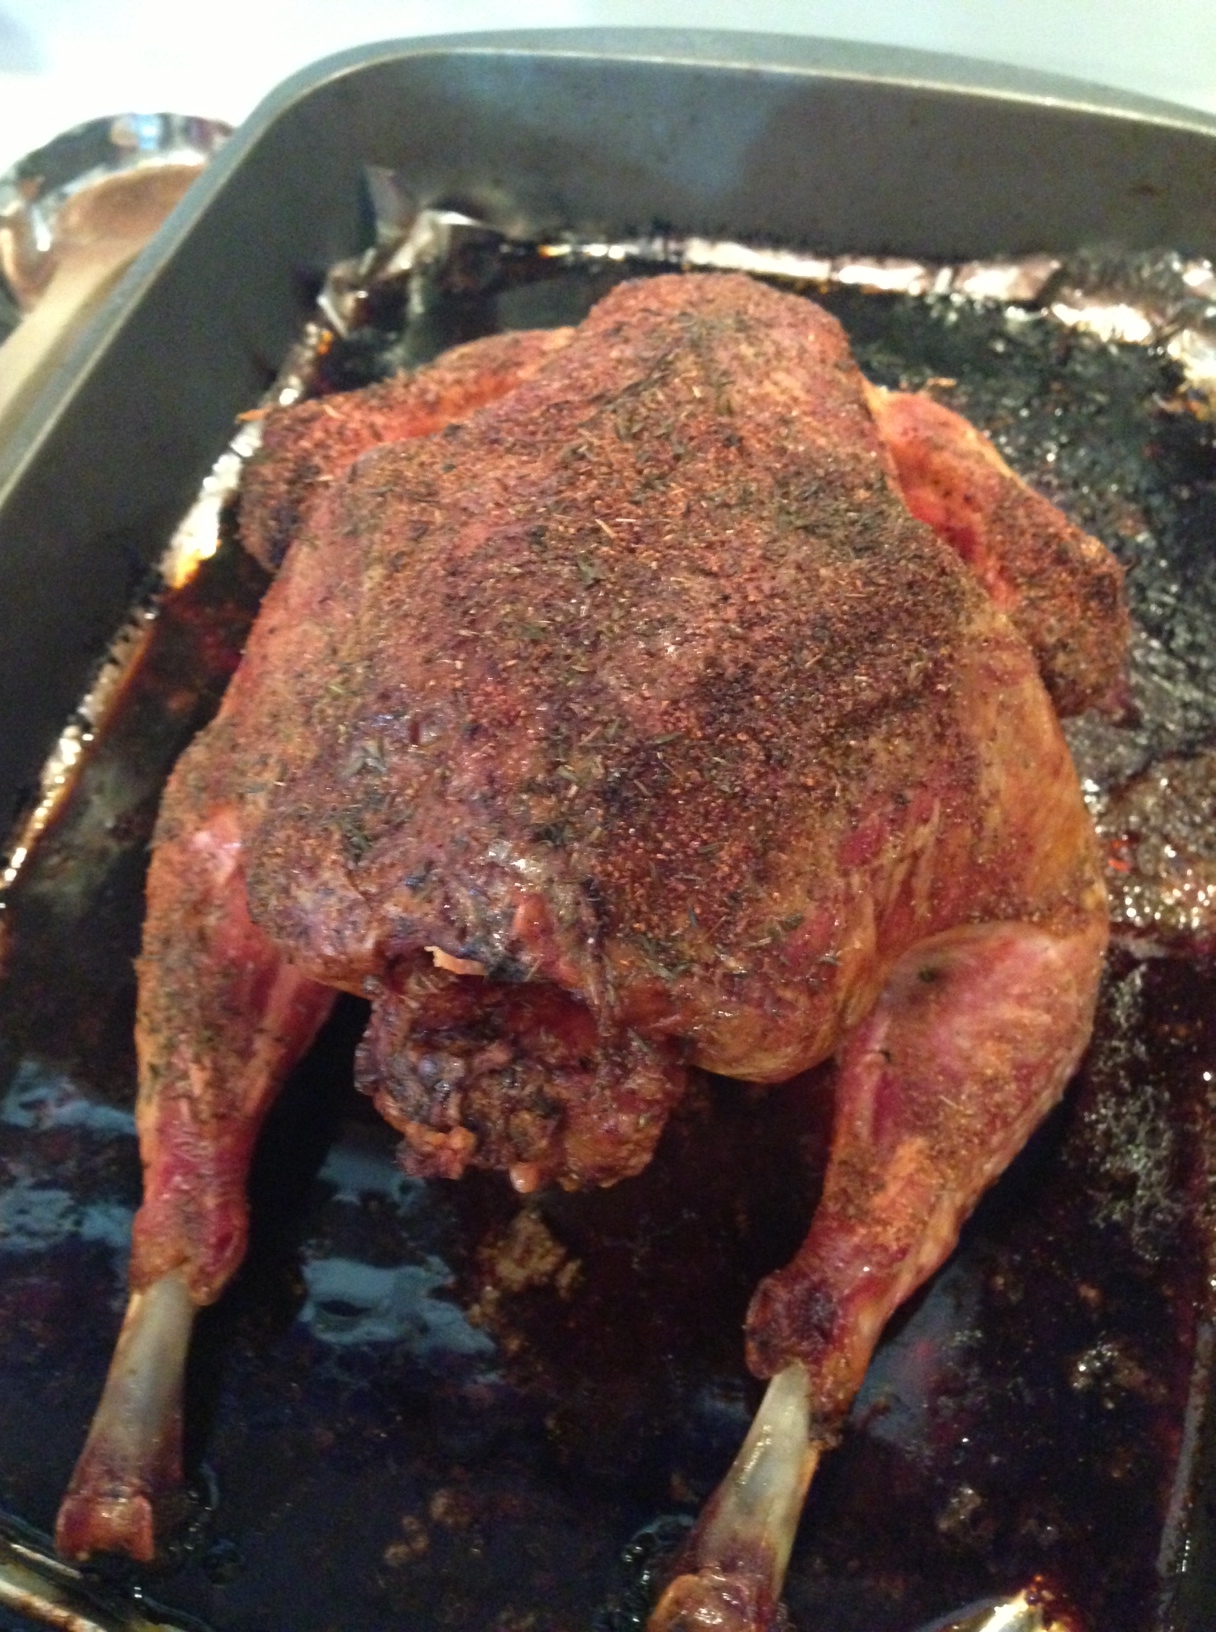
P.S. (that’s ‘pre’ script!) I left my turkey in the pan even though the bottom of it blackened.  Yup.  It happens and even though I love my blog I am just not the kind of girl who is going to place her turkey on a pretty platter just for a photo.  Who has time!?

Yes it is late September and I am in the mood for turkey.  I love me a nice roasted turkey.  The aroma of that heavenly non-chicken savory-ness permeated my house while it cooked away.  Mmmmmm…

We Americans have become so Thanksgiving-ingrained about turkeys that they can be down right hard to find outside of November, but I knew Whole Foods wouldn’t let me down (and at their prices, let’s face it: they’d better not!)

So I got myself an organic turkey yesterday for $3.99/lb.  For a nine pound bird that’s, ahem, close to FORTY DOLLARS.  How the heck does the full time homemaker–married to a public school teacher–swing a 40 buck-bird for dinner?  Well I am just so glad you asked.

I don’t.  That is; I don’t swing it for one dinner.  My friends, to make this purchase worth it I go Native American on my bird.  Oh yeah.  NOTHING IS WASTED.  The only way I can justify spending this kind of loot on a turkey is to stretch that meat into a bunch of meals.  Don’t you want to know what I do? (yes.)  Would you like me to walk you through all the stages? (yes.)

OK.  Here we go.

1. Prep your turkey.  Super easy plan here.  Fall has actually descended in So-Cal (thankyouthankyouthankyou) and the weather is a tad cooler, but it’s not cold enough outside for me to have a hankering for some stuffing and that sort of thing.  So I kept my plan pretty light:

turkey stuff

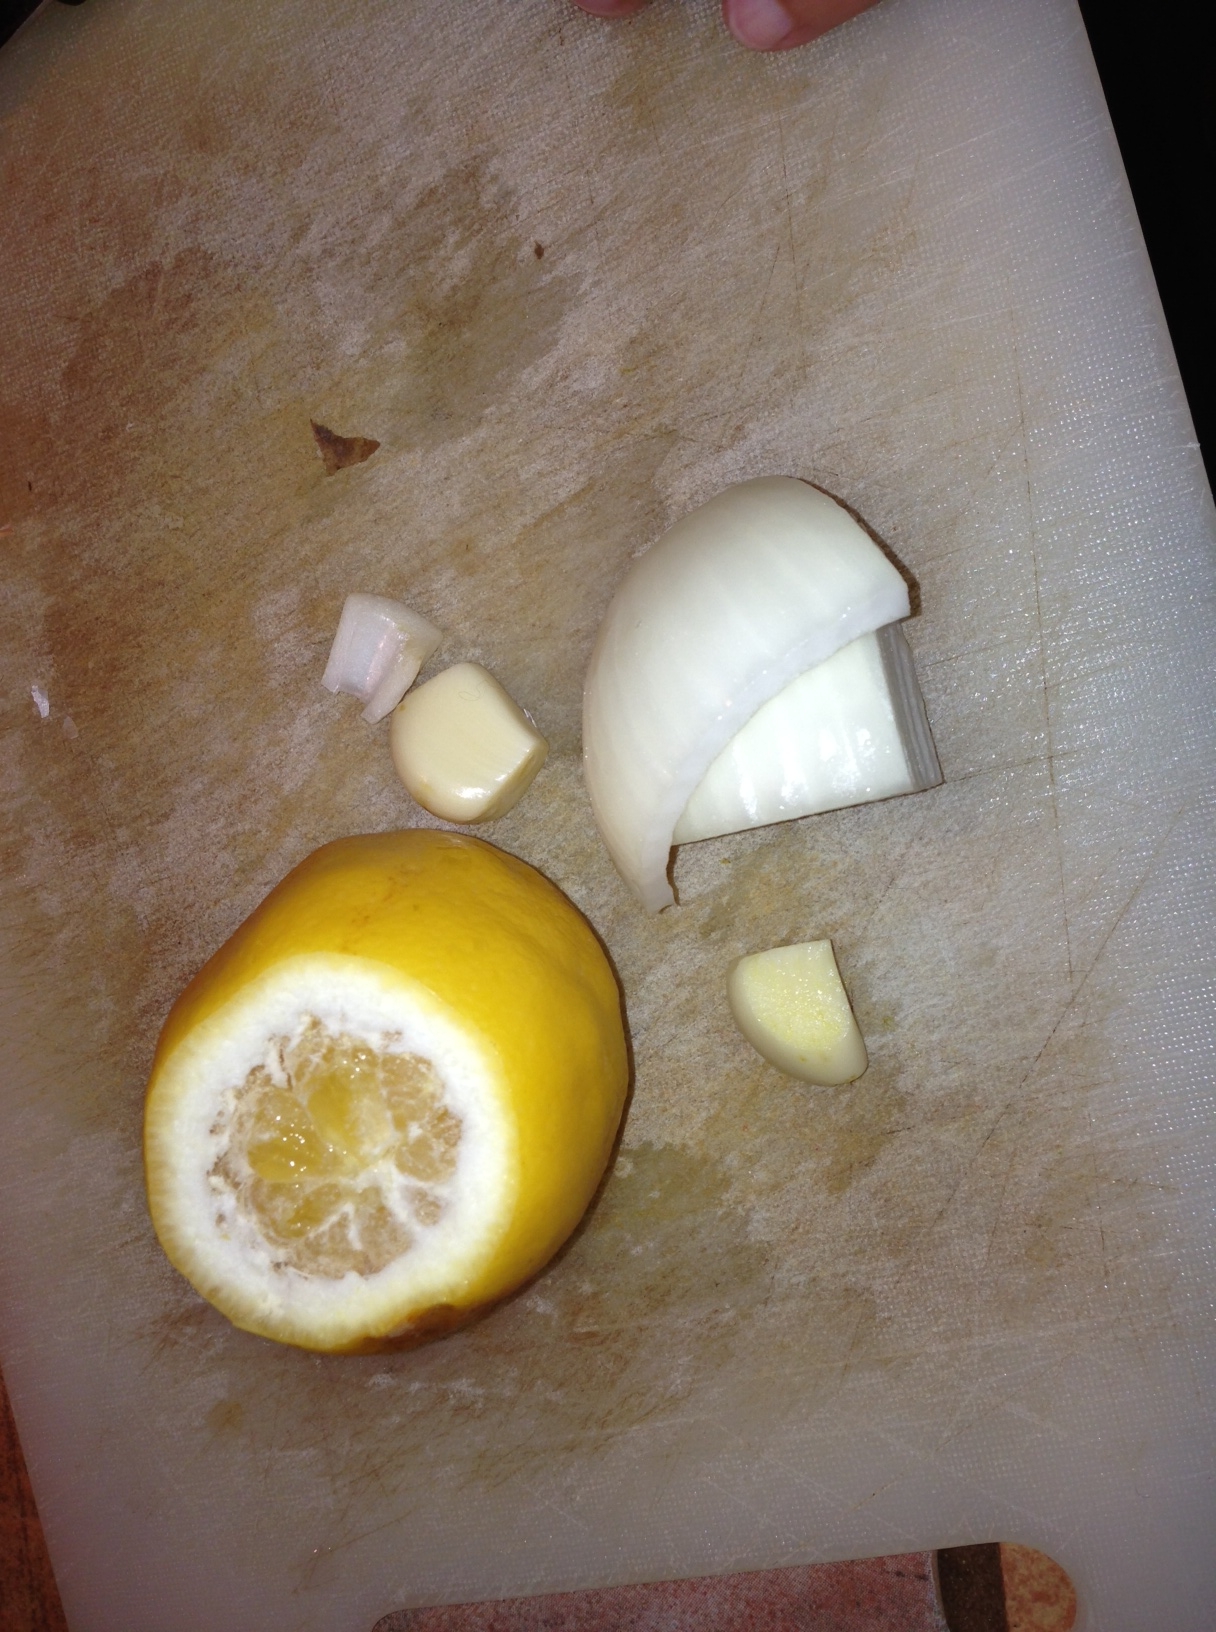
After removing the neck and the bag of whatever-the-heck-that-was from the cavity of Mr. Turkey, I put in a quarter of an onion, two garlic cloves and a lemon (ends chopped off with holes forked around the sides.)

2. Then, you may have noticed that my turkey doesn’t look like June Cleaver’s (and never will, thank you very much.)  Just like when I roast a chicken I always place the breast side down to insure the largest pieces of meat will stay tender and juicy.  My sister calls this “downward dog style.”

raw turkey

Then, on top I used the following ingredients: 1/2 cup white wine, 1/2 cup orange juice, drizzle olive oil.  Sprinkle top with whatever yummy stuff you’ve got in your spice drawer.  I used several dashes of thyme, garlic powder, garlic salt, black pepper and I think some oregano.

3. Also just like when I cook a chicken I set the oven at 425 degrees and cook for 25 or so minutes.  Then reduce temp to 325 and cook approximately 25 minutes per pound.  This was a 9 pounder so I left it for about 2 1/2 more hours.  I checked it at about 2 1/4 hours and it was done.  How did I know this?  My handy meat thermometer (inserted into thigh after taking out of oven to check) read just above 155 degrees.

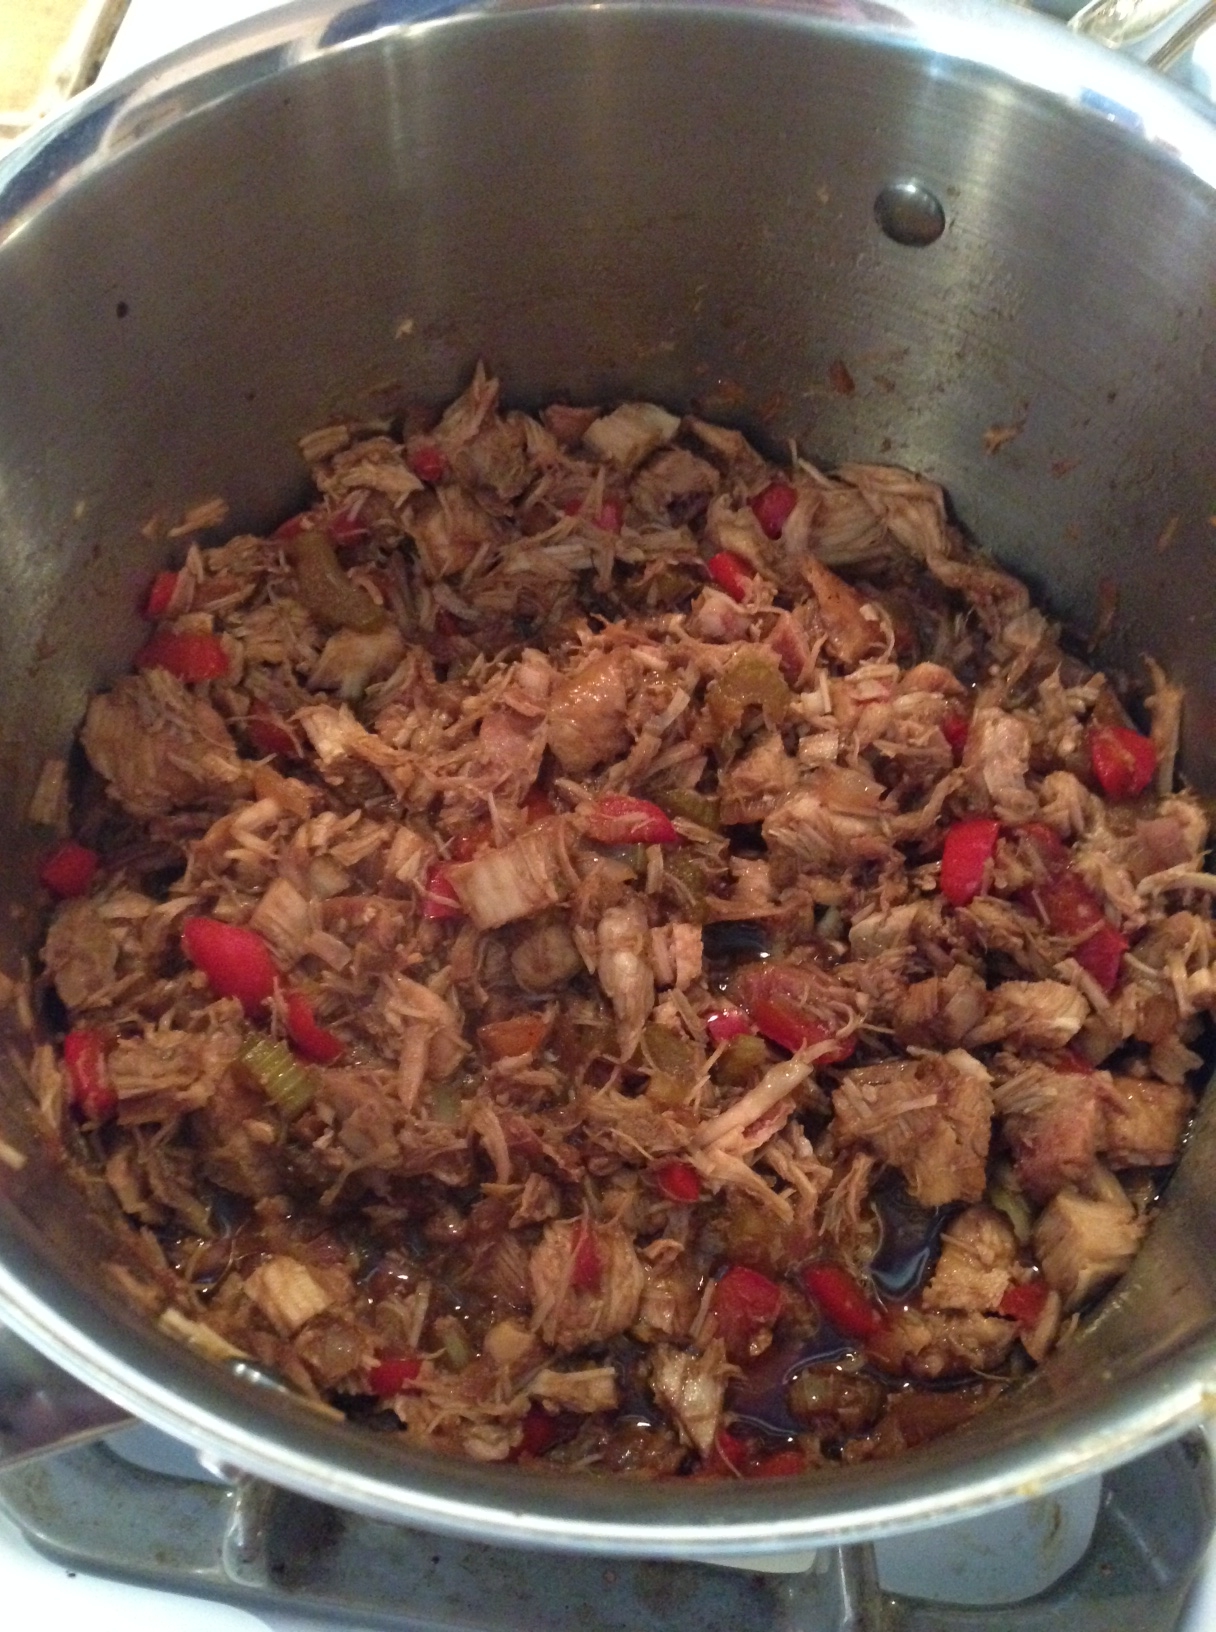
Back to the justification piece…  After the turkey cooled I de-boned it and had two sets of leftovers.  All the meat:

turkey meat

And then the bones or carcass:

turkey carcass

This is, in fact, my favorite part as I will boil these bones in water (with the lemon, onion and garlic) for about 90 minutes to get the most delicious broth you’ve ever tasted.  If my house smelled good with the turkey in the oven, just imagine what it will smell like with these bones simmering away.  Yu-uhm.

So, last night we had turkey with rice and broccoli.  I will use the leftover meat and soon-to-be broth to make, likely 3 more meals (including soup which I am so excited about I can hardly stand it!)

If you do the math now, I spent about 40 bucks on the turkey, but if I use it for four meals for five people that’s around $2.00 per person per meal.  For organic turkey that’s pretty good, right?  And if I can squeak another meal out of the meat I could drop that cost even more.

How many recipes can a girl make with turkey?  Again, so glad you asked.  Turkey soup is coming pronto.  I’m also thinking about turkey enchiladas, toasted turkey sandwiches and maybe turkey fajitas… or maybe turkey stir fry… or wait… so hard to decide!

Do you want to see my recipes for turkey leftovers?  (yes.) Coming soon!

Turkey ingredients recap:

Ingredients: 9 pound turkey, two garlic cloves, 1/4 onion, fresh lemon, 1/2 cup OJ, 1/2 cup white wine, drizzle olive oil, generous dashes of garlic salt, garlic powder, black pepper, thyme and oregano.

Direction recap: Cook at 425 for 25 minutes and then lower temp to 325 and cook for 25 minutes per pound.  Internal meat temp should read 155 when done.

Tips: I place a piece of aluminum foil in the bottom of my roasting pan to help with cleanup.  Also, I added water this time about 1/2 way through roasting as the sizzling pan started to create a bit of smoke.

Baked Beans for Labor Day!

baked bean casserole

Shocked as usual, I cannot believe that the unofficial end of summer–also known as Labor Day–is one week from today.  Wow.

My family loves baked beans.  LOVES them.  For a potluck party we attended a few weeks ago I decided to bring a baked bean hotdish (Yes, I’m from Minnesota and we do that.  And we make it in Corning Wear which is featured above.  So there.)

Baked beans are so cool because, although they’re a bit heavy on the “sugary side” of life, they are still a great source of fiber, complement a million different entrees (burgers, brats, BBQ chicken, pasta–no, not pasta!  Just checkin’ to see who’s awake this Monday morn. :)), and are super cheap-ola to make.  That’s a win-win-win in my book.

So, to create this giant pot of yum I Googled Baked Beans and basically pulled bits from a handful of recipes that looked pretty dang tasty.  I grabbed what I already had in the cupboard and fridge and through it all together.  It was the right approach.  The beans ROCKED!

Michelle’s Everything-But-the-Kitchen-Sink Baked Beans

Ingredients:

Step one:  1 large onion (I used a Maui which is sweet) diced, 1 diced bell pepper, 1 diced tart apple, 3-5 crushed cloves of garlic, few handfuls of leftover diced ham (recipes called for bacon but I didn’t have that), black pepper, two tbsp. olive oil

Step two: 5 15 oz. cans of baked beans (I used Bush’s, plain), 1/4 cup ketchup, 1/4 cup mustard, 1/4 cup brown sugar, many dashes of chili powder, chipotle powder, black pepper, few glugs of Worchestershire, soy sauce, dash of balsamic vinegar, splash of beer (kinda fell in…)

Directions: take your step one ingredients and saute in a pan until the onions and pepper soften (approximately 10 mins) like this:

pre-beans

Then toss it all together with the step two ingredients in a giant pot.  Mix it up and pop’er in the oven at 350 for 60 or so minutes.  I broiled the top so it would get that nice darker crust situation goin’ on.

(Side note for my measuring friends: this is a great example of a time when it’s really best to just wing it.  I mean with a list of ingredients like the one above, how can you go wrong?)

The party guests made quick work of this dish, and I was glad I had made so much.  The leftovers for dinner the next night were even better!

And, if I get invited to a Labor Day celebration, I do plan to make these beans.  Just puttin’ it out there…

P.s.  Quick shout-out to my South Pasadena Mom’s Club peeps who attended “Thinking Outside the Lunchbox” last night!  It was so much fun!!!

Easy-Peasy Chili

easy chili

OK.  So my girlfriend, Jen, requested I deliver on my promise to post my chili scene before the weather turns.  As she is one of my favorite people on the planet (she helped schlep my kids and even brought me a gorgeous plant when I was on my imagined death bed last month,) this is a request I am happy to accommodate.

Michelle’s Easy-Peasy Black Bean Chili

Ingredients: 2 tbsp. olive oil, 1/2 med onion (diced), 1 clove crushed garlic, 2 med bell peppers (diced–approximately 1 1/2 cups), Two 15 oz. cans black beans (with liquid–don’t drain’em!), One 15 oz. can diced, stewed or crushed tomatoes, One 6 oz. can tomato paste, 1 1/2 tsp. chili powder, salt and pepper to taste.

Directions: Simmer onion (any kind will do,) garlic and olive oil for a few minutes.  Add bell pepper and cook until peppers start to soften.  Add everything else, stir and bring to a boil/simmer until peppers are fully cooked.  You.  Are.  Done.

(OK.  Yes you can top off your creation with shredded cheese, diced onions, sour cream, what have you… Then.  You.  Are.  Done.)

Tips: You can use fresh tomatoes if you have them, but this is the “easy-peasy”  recipe so we’re going with that theme.  Any color bell pepper and any type of onion will do.  This is a mild version so my kids will enjoy it as well.  Often I serve my three little Gringo-mouths first and then add cayenne and chipotle powder or hot sauce to Mike and mine.

You can use other beans besides black (kidney, red, white, pinto) if you like, but I only include the liquid of black beans when I cook.  Any other kind tends to have that viscous water-ish situation that I prefer to drain.   It grosses me out.  What can I say?  So, if you use red or another type of bean, you’ll need to add water.

Meat (chopped leftover cooked chicken or cooked sausage, ground beef) can also be added to this recipe, but even my meat-and-potatoes husband found this version satisfying from the get-go.

Besides the obvious ease with which this meal is created (it literally takes me 10 minutes start to finish), I love how healthy and tasty this chili is.  Legumes baby!!!!

My final fave thing about this recipe is the variety of simple ways I can use it to make different meals.  There are soooo many ways, in fact, that I’m going to don this week “Chili Week!”  Tune in all week to see all the easy-peasy-tasty-healthy ways you can make this meal for your family too!

I usually double or even triple/quadruple this recipe, freeze or share with someone I love.

For today, we’ll go with two chili thingies:

Michelle’s fave: Chili with crushed tortilla chips on top (Hey–how did that beer get in the photo!?)

chili with chips

And we also like our chili with cornbread.

chili with cornbread

I usually use Trader Joe’s cornbread mix, and substitute buttermilk for regular milk.   Super yum.

What else can a mama do with chili?  Baby, just you wait…

SLAW

slaw

I’ve a confession to make.  Lately I’ve been a little OCD about cole slaw.  I know, right?  Of all things…

Since my “mouthy no worky” due to illness early this month, I’ve been slowly regaining my sense of taste.  For a few weeks now, even though my tongue is regaining a purpose in life, I’ve been desperate for foods that tasted like the good ‘ol days.

Enter: vinegar.  So I got a hankerin’ for some slaw one day and this idea turned in a two week long mission to find the perfect cole slaw recipe.  I decided that when I developed the recipe I liked, I’d post about it.

My friends, that day has come.

Michelle’s (and Mike, my girlfriend Lisa and daughter Josie’s) Fave Cole Slaw

Ingredients: 1/2 head cabbage, chopped; 2 carrots, shredded; few slender pieces red onion (don’t need to much); 1/4 cup cider vinegar; 1/4 cup olive oil; 2 tsp sugar; few dashes salt; dash pepper

Directions: While you are prepping the veggies, bring the vinegar, olive oil and seasonings to a boil on the stove top.  With the sugar in there this will happen in about 2 mins, maybe less.  Mix your now kinda-syrupy and warm vinaigrette and pour it over the top of your naked veggies.  Toss all this yummy stuff together and let it sit for a few hours before serving.  That’s it!

Tips: I like unfiltered cider vinegar (but then I’ve been working on jump starting  my taste buds so it could just be me.)  I played around with several cole slaw recipes before I deduced this one.  I don’t mind the mayonnaise type slaws, but they are so darn unhealthy that I figured I’d put my energy into the vinegar based kind.

The real secret with this recipe lies in the heating of the dressing before putting it on the veggies.  It doesn’t blanch the cabbage, per se, but the heat does do a little voo-doo which is nice.  Plus, heating dissolves the sugar and makes for a nice light syrup.

This recipe is pretty mild, actually, but makes for a great side dish for BBQ chicken, tacos, ribs, sandwiches.   I like this slaw because it’s easy-tasty-healthy (my three fave food adjectives!)

There are fancier concoctions that yield some nicely complex slaw situations, but for the effort, cost and taste, this  simple slaw recipe gets my vote.

Finally (seriously, how much can a person say about cabbage!?) I never knew how darn healthy cabbage is for ya!  It’s loaded with fiber, vitamin C, E, calcium, serves as a blood detoxifier… plus it’s cheap as heck and literally lasts for weeks in the fridge.  No wonder it’s such a big staple for so many cultures world wide.

OK.  I’m done.