Fruit Salad: Yummy! Yummy!

fruit salad

Here you see the remnants of my strawberries that taste great but are already turning soft (will have to talk with my farmers market vendor next week… just got these on Saturday!), my oranges that Rhea says have “too much white stuff around them” and some on-the-verge-of-banana-bread bananas.

And what does a economizing mama do with all the above ingredients?  Cut off the “white stuff,” sift through the berries and toss a few pieces of each banana–and then make a fruit salad, of course.

Served in the fanciest breakfast establishments, one would think that fruit salad is a tad high brow.  But I have my suspicions that people more along the lines of my frugal Grandma Millie came up with this concoction.

“What shall we do with all this fruit that has bad spots here and is starting to turn, ma’am?”

“Cut out the good pieces and put it in a pretty glass bowl.  And we shall call it: fruit salad!”

Many vendors at farmers markets have special buckets for people (yes–people like me) who are willing to cut out a spot here and overlook a mark there; and pay 1/3 the price of the pretty produce.  For example, I often purchase organic apples for $1.25 lb just because they aren’t picture perfect.  Then I chop’em up, throw out the few brown parts, and make apple sauce.

Beautiful, delicious, healthy, economical–these are some of my favorite things!

Cut It Out!

Poultry shears

These are my Cutco Poultry Shears.  These shears are my favorite kitchen gadget in the universe.  Yes.  I said “universe.”

I’m actually not a gadgety-girl.  Some foodies are, but I’m a little too cheap and I often have a dickens of a time locating the gadgets I’ve already got, so if I can make due with what’s in my drawer, that’s my plan A.

(I interrupt this post with a tiny notification: you should know that I have no affiliation with the Cutco Company–including being related or even acquainted to/with anyone else who does.  I just really like this product and so I’m going to tell you about it.  Thank you for reading my disclaimer and have a nice day.)

OK.  These poultry shears were a gift.  This is a very good thing because they cost around $100.00.  I know, right?  That’s a lot of money to cut a dang chicken.

Here’s the thing though: they do soooo much more.  I use these shears at least five days a week.  I cut salad greens, sometimes fruit, the tips off green beans, I cut pizza slices–and even occasionally use them to cut poultry!

These little honeys are strong.  The knife set I got when Mike and I were married 14 1/2 years ago came with its own poultry shears.  I used to use them if my Cutco ones were in the dishwasher, but they broke so long ago I can’t even remember what they looked like now…  I replaced those cheaper shears with some (from Bed Bath & Beyond, maybe?) thinking that I should have that extra pair for emergency situations, but they eventually broke too.

My Cutco Shears can cut through bone and probably even a car door if I had the strength to propel them.

So, the hundred bucks might sound like a lot of money (OK, yes it is a lot a money) but I have had my Cutco Poultry Shears for around twelve years, use them constantly, and they are still goin’ strong.

If you don’t want to cough up such big bucks, at least make sure that when you get some poultry shears, they come apart for proper cleaning like this:

Shears apart

Yeah… You don’t want your poultry tidbits to get left behind in a little corner of the hinge or anything.  Gross!

If there’s ever a night-time emergency in our home (this is southern CA, take your pick of possible options), Mike and I have our assigned duties: He gets the girls, I get Grayson, we make a grab for the laptop with our family photos if it’s handy–and the Cutco Poultry Shears on our way out the door!  (Who knows how they might come in handy in an emergency situation?)

Whew!  Made it.

Energy (who doesn’t need more ‘a that?) Bites

energy bites
     So Teri brought these over to a big ‘ol play-date I hosted one day.  She found the recipe from a super-cutie blog called Smashed Peas and Carrots . (and before I continue, please excuse the lack of spaces between paragraphs on this post–something is not working for Michelle this morning… but I really wanted to share this with you!)
     I like this blog.   Ms. Maggie, the writer, is a mother to four kids under the age of five (yes, you read that correctly.)  She not only manages to keep them alive, apparently, but she keeps up this really smart blog and writes comments about her recipes like, “This is so frickin’ awesome you can’t eat just one!”
     Who can’t respect and admire that?
     Teri put these little honeys out and the kids (OK, yes, and the mamas) gobbled them right up.  I will say this: When I make them the balls are not, uh, perfectly spherical and the sizes are what you might call “varied.”  For this reason I have included the visual of Teri’s Energy Balls.  Mine do taste just as yum though… (Seriously!  So if you ever see, them please don’t make fun.)
     One more comment before I reveal the recipe: These are a no-bake (extra points from Michelle!) situation but they are reminiscent–in a really good way–of cookie dough.  OK.  Here you go.
Energy Bites!
Ingredients:
1 cup oatmeal
1/2 cup peanut butter (or other nut butter)
1/3 cup honey
1 cup coconut flakes
1/2 cup ground flaxseed
1/2 cup mini chocolate chips
1 tsp vanilla
Directions: Mix everything above in a medium bowl until thoroughly incorporated.  Let chill in the refrigerator for half an hour.  Once chilled, roll into balls and enjoy!  Store in an airtight container and keep refrigerated for up to 1 week (or 20 minutes if you’re at my house…)
Tip: Raisins work well in place of chocolate chips too.  Kinda tart and obviously a tad healthier–but I’m not discounting the value of a good chocolate chip!

Willy Wonka’s Garden

raddish

If Willy Wonka had a garden, he would definitely grow radishes like these:  multicolored, peppery, crunchy radishes in rainbow hues.  Oh yeah.

green-yellow cauliflower

Next to the radishes Wonka would grow yellow and green cauliflower we are pretty sure.  These colors grow naturally, by the way.  It’s the white cauliflower that has to be specially grown.

red carrots

And what sort of gardener would Wonka be if he didn’t grow red carrots like these?  Unfortunately they didn’t taste all that great by themselves, but it was fun to try’m and I used them to decorate our weekly coleslaw that I still can’t stop making (I may need to seek help soon…) and tossed some into my red sauce.  Worked fine.

My two oldest are revving up for their roles in the Spring Musical, Wonka Jr. next month.  As you can see, theater influences are infiltrating all our brains, which is fun and fine with me!

And by the way, Wonka doesn’t need to plant a magical garden.  All these produce items are available at local farmers markets right now (you know, if you’re lucky enough to live in sunny So-Cal…)

Better than a Fudge-ripple chocolate bar?  Well now… 🙂

I Couldn’t “BEET” This One

beets

OK, so Jennifer got me.  This Once Upon a Chef inspiration really got me with her balsamic glazed roasted beets.

Developing one’s personal arsenal of recipes rarely begins from scratch.  These days it’s just too easy to see what all the other foodies are up to out there!

Usually I make a new recipe by following the prescribed rules (OK, yes, mostly following the rules.)  It just makes sense and there’s almost a sense of ‘honoring’ the original creator–although as most recipes have been borrowed and tweaked from hand to hand who knows where it really all began?

But I have my own take on kitchen concoctions and love to play around with possibilities… I enjoy adding more of this or substituting that to see if I can “Michelle-ize” the recipe.  Hey, we all get our kicks in different ways…

This recipe for beets, however–as many simple recipes are–is absolutely perfecto as-is.  I would not change one single solitary thing.

I made it.  We ate it.  We wanted more.

Also, as Jennifer states on her blog, the glaze is actually good enough to drink.  My girls greedily scooped it up with their spoons and slurped down every last drop.

Balsamic Glazed Roasted Beets

Ingredients: Approx. 6 med. beets, salt, olive oil, maple syrup and any balsamic vinegar (don’t go fancy-vinegar here, doesn’t matter)

Directions: Clean, peel (if you like) and cube the beets.  Place on a cookie sheet and drizzle with olive oil/sprinkle with salt.  Roast at 400 degrees for about 40 minutes or until beets are cooked.

As beets are finishing up, heat 1/3 cup vinegar and 1 tbsp. maple syrup on stove top.  Stir constantly as it will heat quickly and you don’t want to burn the sugars.

When the beets are done, simply pour glaze over the top and dig in.

Tips: I used golden beets because that’s what I had.  Although my five-year-old son swears he can tell the difference between red or yellow beets, the rest of the family agrees we cannot.  We don’t argue with Grayson though.  It’s not worth it.

Nutrition info if ya wanna know: Besides magnesium, calcium and iron, beets contain significant amounts of folic acid which helps in the production of new cells.  Beets have also been linked to prevention of cancer, especially colon cancer.

(Also, my girls would like me to point out that it’s very exciting–after eating red beets–to see that your pee has turned pink.  Hey, like I said, we all get our kicks in different ways.)

Spreadin’ the Word

MOM's Club 1

Recently I’ve had the privilege of speaking with some super-cool moms at MOM’S Club of Altadena and MOM’S Club of Monrovia. (Hey Ladies!  Loved meeting with you all!)

As moms today we have modern conveniences coming out ‘our ears–so why do so many of us struggle with nutrition?

Maybe it’s because–thanks to modern conveniences–it’s so easy to pop processed foods into lunch boxes as our kids sprint out the door.  Maybe it’s because as a society we place far more emphasis on test scores than we do on eating properly.  Maybe it’s because we’re all so dang busy…

What I have learned since beginning my family-journey  nine years ago is that if you want to eat well and get your family to do the same, you have to be very intentional about it.  If you’re occasionally flipping through a magazine article or glancing around at what most people consume, well, you’ll see it’s a low bar.

I’ve seen statistics that state somewhere around 4% of children eat properly on a regular basis.  Childhood obesity and Type 2 diabetes is rising so quickly that experts predict our kids’ generation will actually have a shorter life expectancy than ours.

Um… what the WHAT!?

I’m a “Generation X’er.”  What is my children’s generation going to be labeled?  “Generation heavier-die-younger?”

When I talk to moms about nutrition my message is triple motivated 1. I have a handle on easy-tasty-healthy food at my house (my kids are in that 4 %!) and I’m thrilled to share what I know.  2. I’m hoping that if more people like me do this we can, perhaps, come up with a different label for all our kids to share!

MOM'S Club 2

3. Besides reminding myself of the importance of what I do in the kitchen I always learn from other parents when I present.  It’s just as empowering to share my message as it is to get ideas from others.

Here’s to finding healthy journey for all our families–and to enjoying the experience along the way!

Making the world a better place, one meal at a time: that’s me. 🙂

Cupcake Diaries

finished!

So it was Grandma Maye’s (my mother-in-law) birthday yesterday and my trio of kitchen sidekicks wanted to kick it in the kitchen.  Josie, my middle love, has been reading Cupcake Diaries by Coco Simon and wouldn’t you know that the books contain recipes…  Sounds like one of those serendipitous moments when the planets line up–or at least that what my kiddos thought.

A healthy organic plant-based diet is what I shoot for in general, but I’m not made of stone.  Of course we can make cupcakes from scratch.  Whytheheck not?

recipe

Don’t worry.  I’m going to retype it in real people letters for your ease and entertainment.

Vanilla Cupcakes from Mia in the Mix by Coco Simon

Ingredients: 1/2 cup unsalted butter, 2/3 cup granulated sugar, 3 large eggs, 1 tsp. vanilla, 1 1/2 cups flour, 1 1/2 tsp baking powder, 1/4 tsp. salt, 1/4 cup whole milk

Directions (as usual, I ignored pretty much all the “do this step first and then do this” type instructions… sorry.  I said I would make cupcakes, I didn’t say I liked baking!  I still dislike it as much as ever…)  So, my directions are: put it all in a bowl and mix it up.  Oh–and I think I forgot the baking powder.  I got distracted when there was some heated arguing over who had “poured in the most stuff” that resulted in everyone stepping away from the bowl for a few minutes to re-evaluate our purpose in life.  We regained our purpose, overall, but I really don’t remember getting the baking powder out of the cupboard after all was said and done… and nobody complained so let’s just keep this tiny oversight between you and me.  K?  Thanks!)

Vanilla Butter Cream Frosting

Ingredients (I quartered the amounts and the original quantities would have been enough frosting for 100 cupcakes!)  2 tbsp. room temp. butter, 1 cup confectioner’s sugar, 1 1/2 tsp. whole milk, dash vanilla.  Mix and, uh, put on the cupcakes.

Sweet, fattening treats for the heck of it?  Not super common at my house.  Sweet, fattening birthday treats that connect literature to real life, allow my kids the chance to create and give to someone they love, feel proud of what they, themselves made and the opportunity for Josie to begin plans for her own foodie blog some day: I’m in.

Josie

Chili Week Cha-Cha-Cha!

chili for breakfast

OK,  this photo is not destined for Sunset’s cover, but I saved my ultimate fave-ola breakfast (if you’ve been following, you know how much I love a good meal to kick off my new day…) scene for Friday: Chili with an egg on tortilla.  Man is it tasty.

I like my egg over med, scoop some chili in the pan for the last minute or so to heat it up, add a little shredded sharp cheddar cheese and some hot sauce… seriously… this… is… so… good!

Corn or flour tortilla will do.

If you’ve lost count, that’s five (5!) options from one chili recipe.  What a way to celebrate national, local Michelle’s independent Chili week!

This chili freezes well, btw.

I think if you Google “chili recipes” you’ll be amazed at all the ways you can heat up a pot of spicy-tomato-y-beans and what-not for dinner.  I’ve used recipes with cocoa powder, a multitude of beans (obviously not from Texas,) different meats… it’s really fun to experiment with the options.

And in that vein, here is another fun recipe for vegetarian chili  that I made a few weeks ago.  It was my usual method of preparation (winging it) but I actually took the time to record my adventure for your benefit.  If I had to think of a title for delicious concoction, I guess I’d go with:

Michelle’s “This Time” Chili:

Ingredients: 1 large diced onion, 3 cloves crushed garlic, 1 cup chopped celery, 2 cups chopped bell pepper, Two 15 oz. cans drained kidney beans, One 15 oz. can drained pinto beans, One can black beans w/liquid, One 12 oz can tomato paste, 1/2-3/4 bottle of beer (OK–yes I took a few sips so I’m not sure…) 1 tsp garlic salt, 2 1/2 tbsp chili powder, 1 tsp. cayenne, 1 tsp. black pepper, pinch of sugar

Directions: simmer the onions, peppers, celery and garlic until it all begins to soften.  Add everything else and bring to boil.  Simmer until veggies are fully cooked.  Open another beer and sit down to dinner!

Adventures in Chili, Parte Dos!

chili on potato

OK.  So here’s a chili option for all you gluten free guys and gals (or not, whatever): Chili on a baked potato!  Yu-uhm.

I like my tater-chili topped with a dollop of Greek style yogurt and a dash of hot sauce.

Or… my versatile chili is so, uh, versatile that you can even slap it on a tortilla with some taco fixings (Yes!  It’s true!):

chili on tortilla

Here is my chili/bean burrito with some (you guessed it) hot sauce, fresh cabbage, little shredded cheese maybe (I can’t remember and it might be tucked inside.)

One recipe for easy-peasy Chili and look at all the fun you can have!  I know.  You’re welcome.

And, ladies and gentlemen, I’m still not done… but you’ll have to tune in Friday for my final cha-cha-chili post.

On a side note and because I’m not done with my coffee yet so I may as well keep typing… I was once informed by a Texan that real chili doesn’t even have beans in it.  Being of Latino-German heritage and growing up in Minnesota, I was unaware of this.  So, if you’re from Houston and you’re reading this entry, please reserve judgement.

I’m not Tex-Mex, I’m “Min-Mex.”   Forgive me.  I don’t mean to offend… 🙂

Coffee complete.  Have a great day everyone!

Michelle’s Easy-Peasy Chili

Ingredients: 2 tbsp. olive oil, 1/2 med onion (diced), 1 clove crushed garlic, 2 med bell peppers (diced–approximately 1 1/2 cups), Two 15 oz. cans black beans (with liquid–don’t drain’em!), One 15 oz. can diced, stewed or crushed tomatoes, One 6 oz. can tomato paste, 1 1/2 tsp. chili powder, salt and pepper to taste.

Directions: Simmer onion (any kind will do,) garlic and olive oil for a few minutes.  Add bell pepper and cook until peppers start to soften.  Add everything else, stir and bring to a boil/simmer until peppers are fully cooked.  You.  Are.  Done.

(OK.  Yes you can top off your creation with shredded cheese, diced onions, sour cream, what have you… Then.  You.  Are.  Done.)

Easy-Peasy Chili

easy chili

OK.  So my girlfriend, Jen, requested I deliver on my promise to post my chili scene before the weather turns.  As she is one of my favorite people on the planet (she helped schlep my kids and even brought me a gorgeous plant when I was on my imagined death bed last month,) this is a request I am happy to accommodate.

Michelle’s Easy-Peasy Black Bean Chili

Ingredients: 2 tbsp. olive oil, 1/2 med onion (diced), 1 clove crushed garlic, 2 med bell peppers (diced–approximately 1 1/2 cups), Two 15 oz. cans black beans (with liquid–don’t drain’em!), One 15 oz. can diced, stewed or crushed tomatoes, One 6 oz. can tomato paste, 1 1/2 tsp. chili powder, salt and pepper to taste.

Directions: Simmer onion (any kind will do,) garlic and olive oil for a few minutes.  Add bell pepper and cook until peppers start to soften.  Add everything else, stir and bring to a boil/simmer until peppers are fully cooked.  You.  Are.  Done.

(OK.  Yes you can top off your creation with shredded cheese, diced onions, sour cream, what have you… Then.  You.  Are.  Done.)

Tips: You can use fresh tomatoes if you have them, but this is the “easy-peasy”  recipe so we’re going with that theme.  Any color bell pepper and any type of onion will do.  This is a mild version so my kids will enjoy it as well.  Often I serve my three little Gringo-mouths first and then add cayenne and chipotle powder or hot sauce to Mike and mine.

You can use other beans besides black (kidney, red, white, pinto) if you like, but I only include the liquid of black beans when I cook.  Any other kind tends to have that viscous water-ish situation that I prefer to drain.   It grosses me out.  What can I say?  So, if you use red or another type of bean, you’ll need to add water.

Meat (chopped leftover cooked chicken or cooked sausage, ground beef) can also be added to this recipe, but even my meat-and-potatoes husband found this version satisfying from the get-go.

Besides the obvious ease with which this meal is created (it literally takes me 10 minutes start to finish), I love how healthy and tasty this chili is.  Legumes baby!!!!

My final fave thing about this recipe is the variety of simple ways I can use it to make different meals.  There are soooo many ways, in fact, that I’m going to don this week “Chili Week!”  Tune in all week to see all the easy-peasy-tasty-healthy ways you can make this meal for your family too!

I usually double or even triple/quadruple this recipe, freeze or share with someone I love.

For today, we’ll go with two chili thingies:

Michelle’s fave: Chili with crushed tortilla chips on top (Hey–how did that beer get in the photo!?)

chili with chips

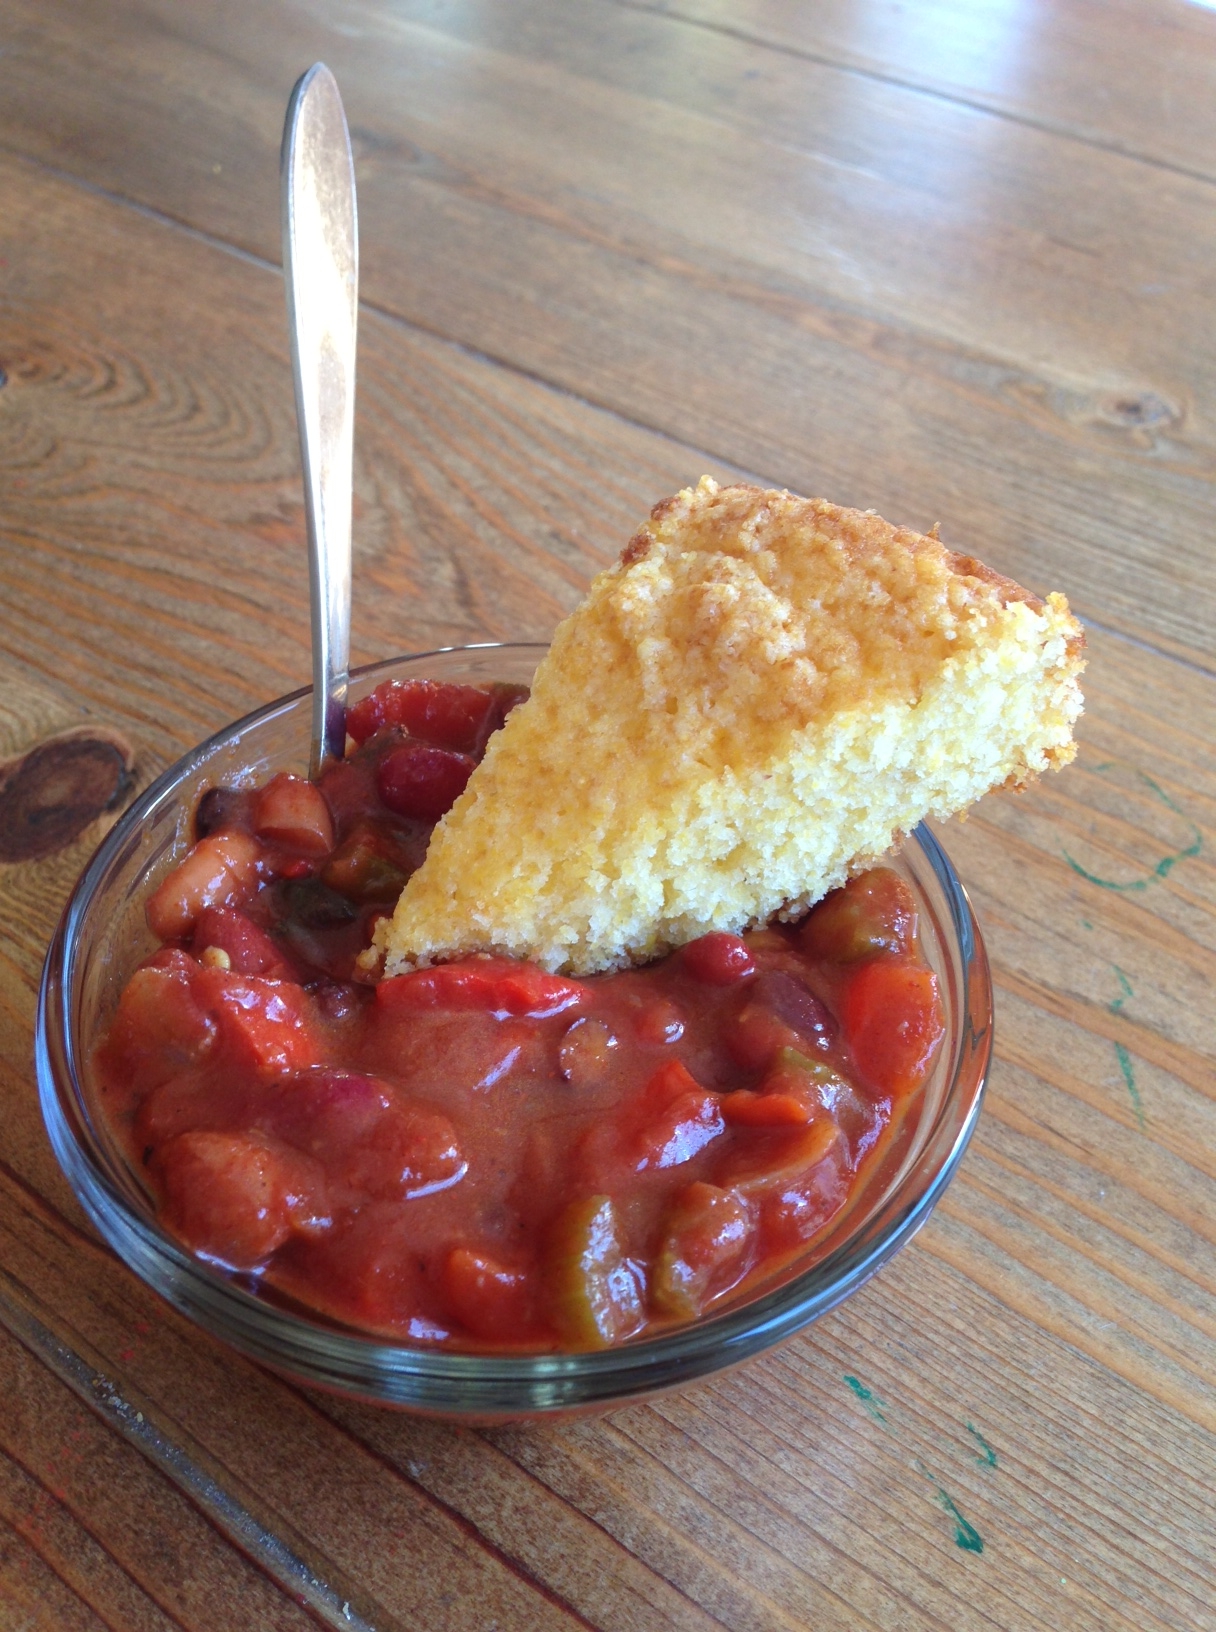
And we also like our chili with cornbread.

chili with cornbread

I usually use Trader Joe’s cornbread mix, and substitute buttermilk for regular milk.   Super yum.

What else can a mama do with chili?  Baby, just you wait…