Beautiful Sister/Ugly Dip

bean dip

I, personally, don’t think this bowl of dip is particularly visually appealing.  The first time my gorgeous sister, Sarah, whipped it up I didn’t get my hopes up too high… And then I tasted it.

Super Bowl of yum.  In fact, yes, I took this dip to a Super Bowl Party yesterday and, as is always the case, it was a huge hit.  The kids who have had it before actually squealed when I took the lid off the top and they saw this stuff ‘cuz they know it’s so tasty.

Beautiful Sarah’s Ugly Bean Dip:

Ingredients: 3 cans of black beans, drained; approximately 1 cup shredded sharp cheddar cheese, some chopped cilantro, approximately 12 oz. mild salsa (my kids don’t care for spicy)

Directions: Mix and serve.

Tips: The ingredient list above is a bit vague.  I have really found, though that the measurements can vary and you can still get a great dip.  Sometimes I don’t have cilantro on hand but if I can scrounge a few sprigs from my mom or another neighbor, I can make it work.  Cheese is the same story.  If you’re a bit short, you can still go for it.

Here’s a photo of the beans, cheese and cilantro before I mixed it so you can see about how much I used:

pre-bean dip

After this I just added the salsa and stirred it all up.  Dip some tortilla chips in that stuff and yummm-oh!

I make this dip on a semi regular basis.  It’s a nice hearty snack and packs some nutrition into the punch.  It’ll keep well in the fridge for a few days and we even take it on picnics and to the beach in the summer.  Enjoy!

Something Blue

something blue

Fruits and Vegetables.  We should all be eating more fruits and vegetables.  I’m assuming this sounds familiar to pretty much everyone reading this blog–if not every person reading any blog.
 
In season right now at my local farmer’s market are Bosc pears that we are totally diggin’ at my house.  Their brown skins make them an exotic addition to the fruit bowl.  Here in sunny southern California even these kiwis are locally grown.  You can get oranges at the farmers market too, but I don’t have to because my mom/neighbor has a tree with prolific amounts of delicious oranges.  Lucky us!
 
Every morning we begin our breakfast with fruit of some kind.  We prefer fresh but are not opposed to an occasional canned pineapple, peach or pears (in its own juice.)

Because I’m a time economizer, I’ve developed the format you see pictured above.  Step 1: Mommy cuts fruit on cutting board.  Step 2: Cutting board is placed on table for mass consumption.  Step 3: Three kids and husband have at it.  Step 4: Mommy–or sometimes Daddy :)–clean up said cutting board.
 
My two girls volunteered as hand models in the photo above–they were so excited to “show everyone how we do it at our house.”  I tried to get a shot that didn’t include the atrocious blue nail polish you see (thanks, Catalina, for the birthday party nail salon!) but couldn’t. 

But then I figured hey, this isn’t the Pottery Barn catalog.  Blue nails and all, here we are eating breakfast at my house.  Have a great day!

I Lied… But it’s OK!

avgo soup

Yesterday I was featured on the mega-blog Hometown Pasadena (enough shameless self promotion… geeze Michelle!)  You may not have even realized my terrible deception about which I’m reluctant to speak… but I really must come clean.
 
My avgolemeno soup recipe has more than 10 ingredients.  There I said it.
 
On my profile page right here on this very blog I clearly state that I turn a blind eye to any recipe with more than ten ingredients… Sigh… obviously not the whole truth.
 
BUT–It’s OK!  Honestly.  There are two reasons why: The avgolemeno ingredients are so rudimentary (milk, egg yolks, rice–stuff like that!) that even though, technically, the list exceeds 10 items, it will not require a trip to the exotic spice store or even the grocery store for many folks.  You likely have most of the stuff on hand.  The second reason why my seemingly reprehensible behavior is OK is that this soup is so incredibly delicious that if you make it there’s no way you can’t forgive me.
 
I considered altering the information on my “about Michelle” page to reflect reality, but I just couldn’t do it.  I mean, I may be a liar, but I’m not dishonest!
 
I thought you’d like to know that I have been invited to be a regular contributor to Hometown Pasadena’s weekly Mangiamo feature.  You can look forward to a delicious little something from me the last Tuesday of every month!  (and might I add: Wooo-hooo!)

For the recipe for the fabulous bowl of soup you see above, please either click on the Hometown link in this post, along the side of my home page, or tucked into the recipe page under soups.

Just For Me

Workshop reminder: Feb. 5 and Feb. 13th!  Check out my workshop page for more details, or comment on this post/email me on Facebook!

just for me!

This blog, and pretty much every piece of my life puzzle right now, are dedicated to getting healthy food into little bodies and keeping the people who make it as sane as possible.

Occasionally, though, it’s nice to take a break from the “we” part of who I am, and do something just for me.

The other day I was alone in my quiet house.  The laundry was done.  Dinner was prepared.  After almost nine years as a full-time homemaker, I’ve let go of conundrum created by holding a Master’s degree and still being OK with checking these sorts of accomplishments off my daily list of to-dos.  It’s all good.

I made a salad.  For one.  Me.  Mixed greens, fresh sliced pears, thinly sliced red onion, grilled chicken, feta cheese and a balsamic vinaigrette dressing that I fixed on the spot.  I didn’t consolidate my efforts in the kitchen by chopping ingredients for future salads.

I didn’t even make enough to share.

p.s. This was a weird day for me–which you already know if you’ve been reading my blog!  I actually love to make ridiculous quantities of food and share it all with the world.  If you’re interested in attending a workshop “just for you” to get some excellent tips on meal planning or how to get your kiddos to eat anything (including a salad!) make a comment on this post or check me out on Facebook!

Punchline Breakfast

(Quick pre-waffle information!  Tomorrow, Tuesday, Jan. 29th I, Michelle Calva-Despard, will be the featured foodie on Hometown Pasadena’s Mangiamo!  Check me out!!!  And now back to your regularly scheduled recipe.)

Waffles

I can’t recall the joke, but it has something to do with two pancakes and what one says to the other when something unfortunate has occurred.  Punchline = How Waffle!  Picture this being delivered by a perky seven-year-old who just bought her very first joke book and you’ll see why I’m smiling.

I did something this weekend that I’m afraid I can’t recommend you try at home… unless you know a lot of people who like waffles.  Come to think of it, doesn’t everyone like a good waffle?  OK, so go ahead and octuple my recipe.  See how it blesses your life!

I made this silly mountain of waffles in honor of a lazy Sunday morning and for my niece who turned eight.  What do you get the eight-year-old who has everything?  Waffles!  And home made whipped cream on the side…

Best Waffles (this recipe is already doubled for your convenience!)

Ingredients: 2 cups flour (I like whole wheat,) 1 tsp. baking powder, 1 tsp salt, 1 tsp, baking soda, 2 eggs, 2 cups buttermilk, 1 tsp. vanilla, 1/3 cup veg. oil.

Directions: mix and pour baby!  I sometimes have to thin the batter a tad with a splash of milk.  Also, even though my fancy waffle iron swears nothing will stick to it… not the case.  I don’t like cooking sprays (have you read those ingredient lists!?) so I quick-wipe my iron with a paper towel dipped in oil between waffles.


Winter Salad

I know I use the word “love” excessively when I talk about food, but, well, I really do love a good salad!

In my humble opinion, a “good” salad should contain a variety of textures and colors and be filled with seasonal produce, when possible, that combine to make interesting and varied flavors.  If you are looking for the iceberg lettuce and ranch dressing, you can stop reading this post now.  If you’d like to tantalize your taste buds (oh my!) and whip up something delicious and nutritious, keep reading…

For a southern Californian, it is easy to make fresh salads year round.  But what’s a meal maker to do if it’s January and one happens to live in, for example, Otisville, MI?  Don’t despair, Michigander amigas!   It is still possible to make a decent winter salad, even if you live in the temporary tundra.  You likely won’t be hitting the farmers market this weekend like I will, but I think you’ll find most of my suggestions at super market near you.

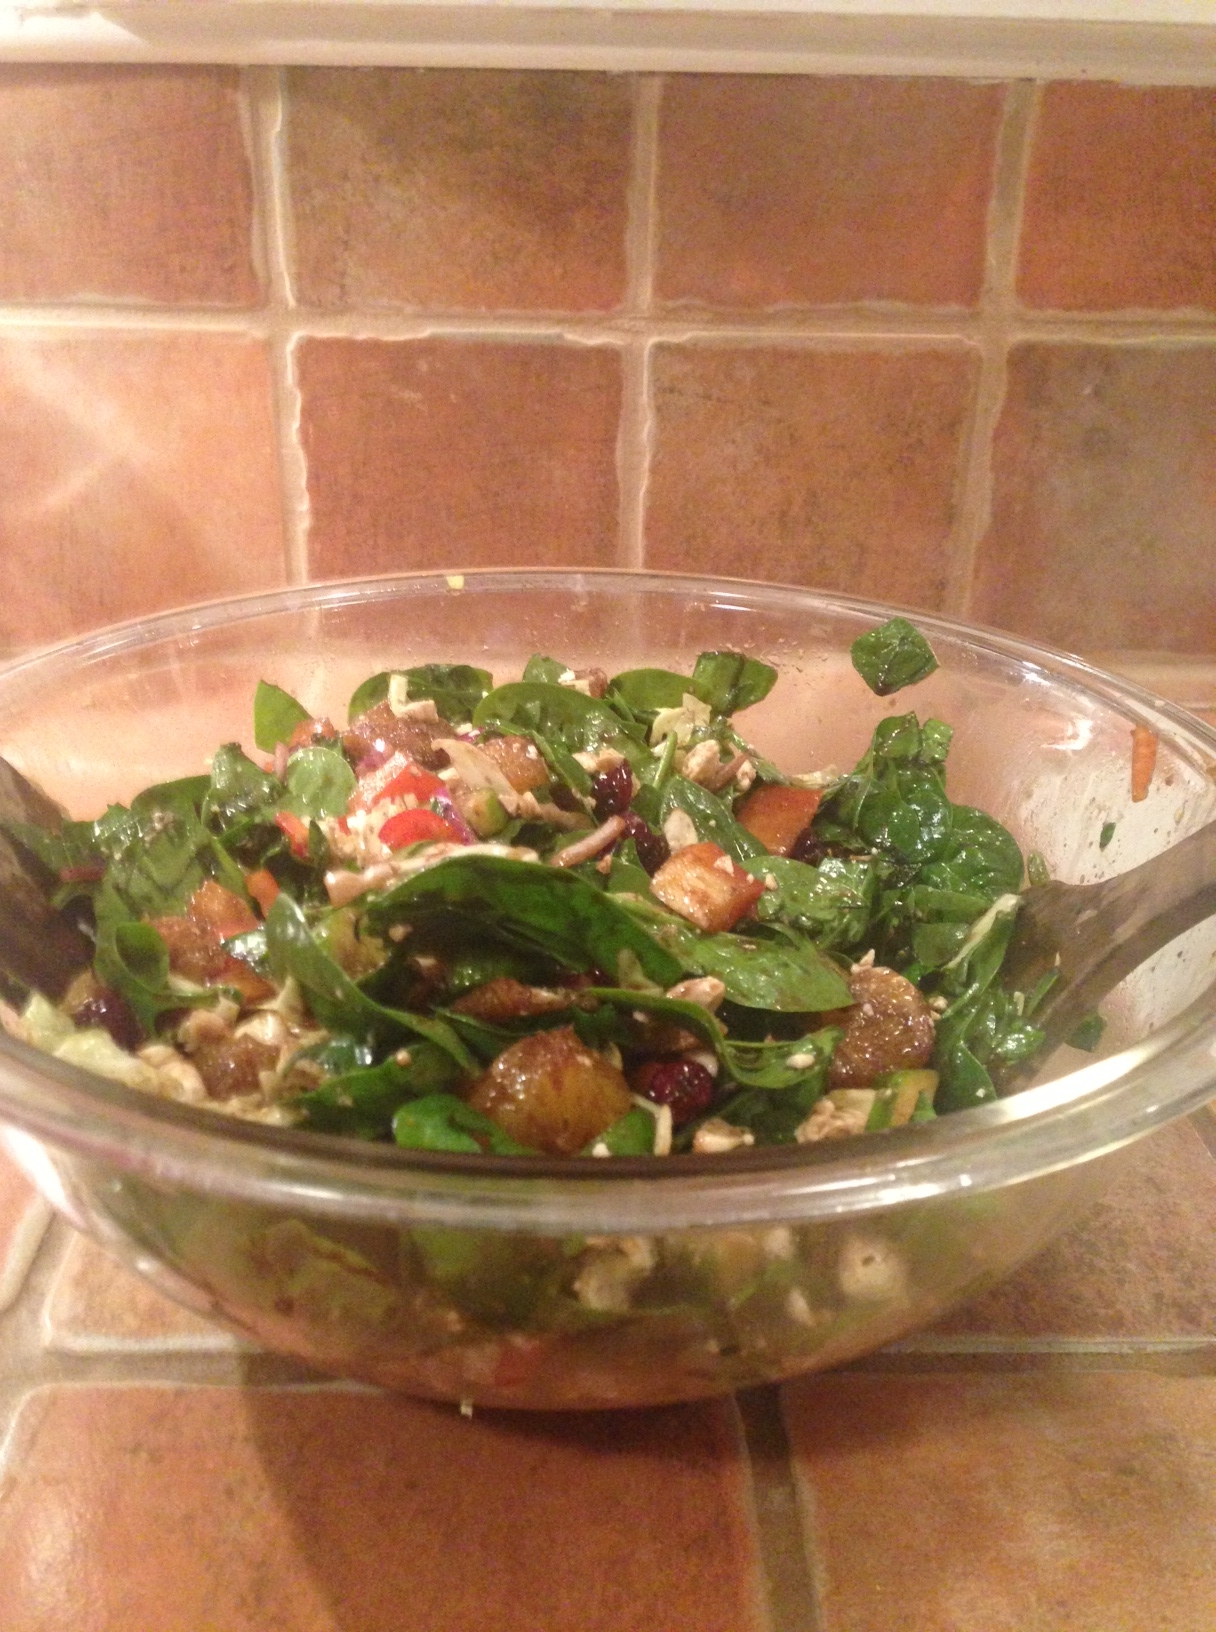
If I use leafy greens, I always start with something dark.  For this salad I used spinach.  You know those fancy restaurants that serve salad sculptures precariously balanced on plates with artsy looking leaves and stalks so large that even a muppet could fit in his mouth?  I hate that.  I like my salad to be easily poppable into my mouth.  You can use a knife or, my fave time saver, poultry shears.  Snip, snip, done!

cutting greens

I chopped up some carrots, celery, cucumbers and then cabbage.  I especially like the striking contrast between the bright white-ish cabbage and the dark spinach.  I do say it is a quite a nice visual, don’t you agree, Dah-ling? (see photo below)

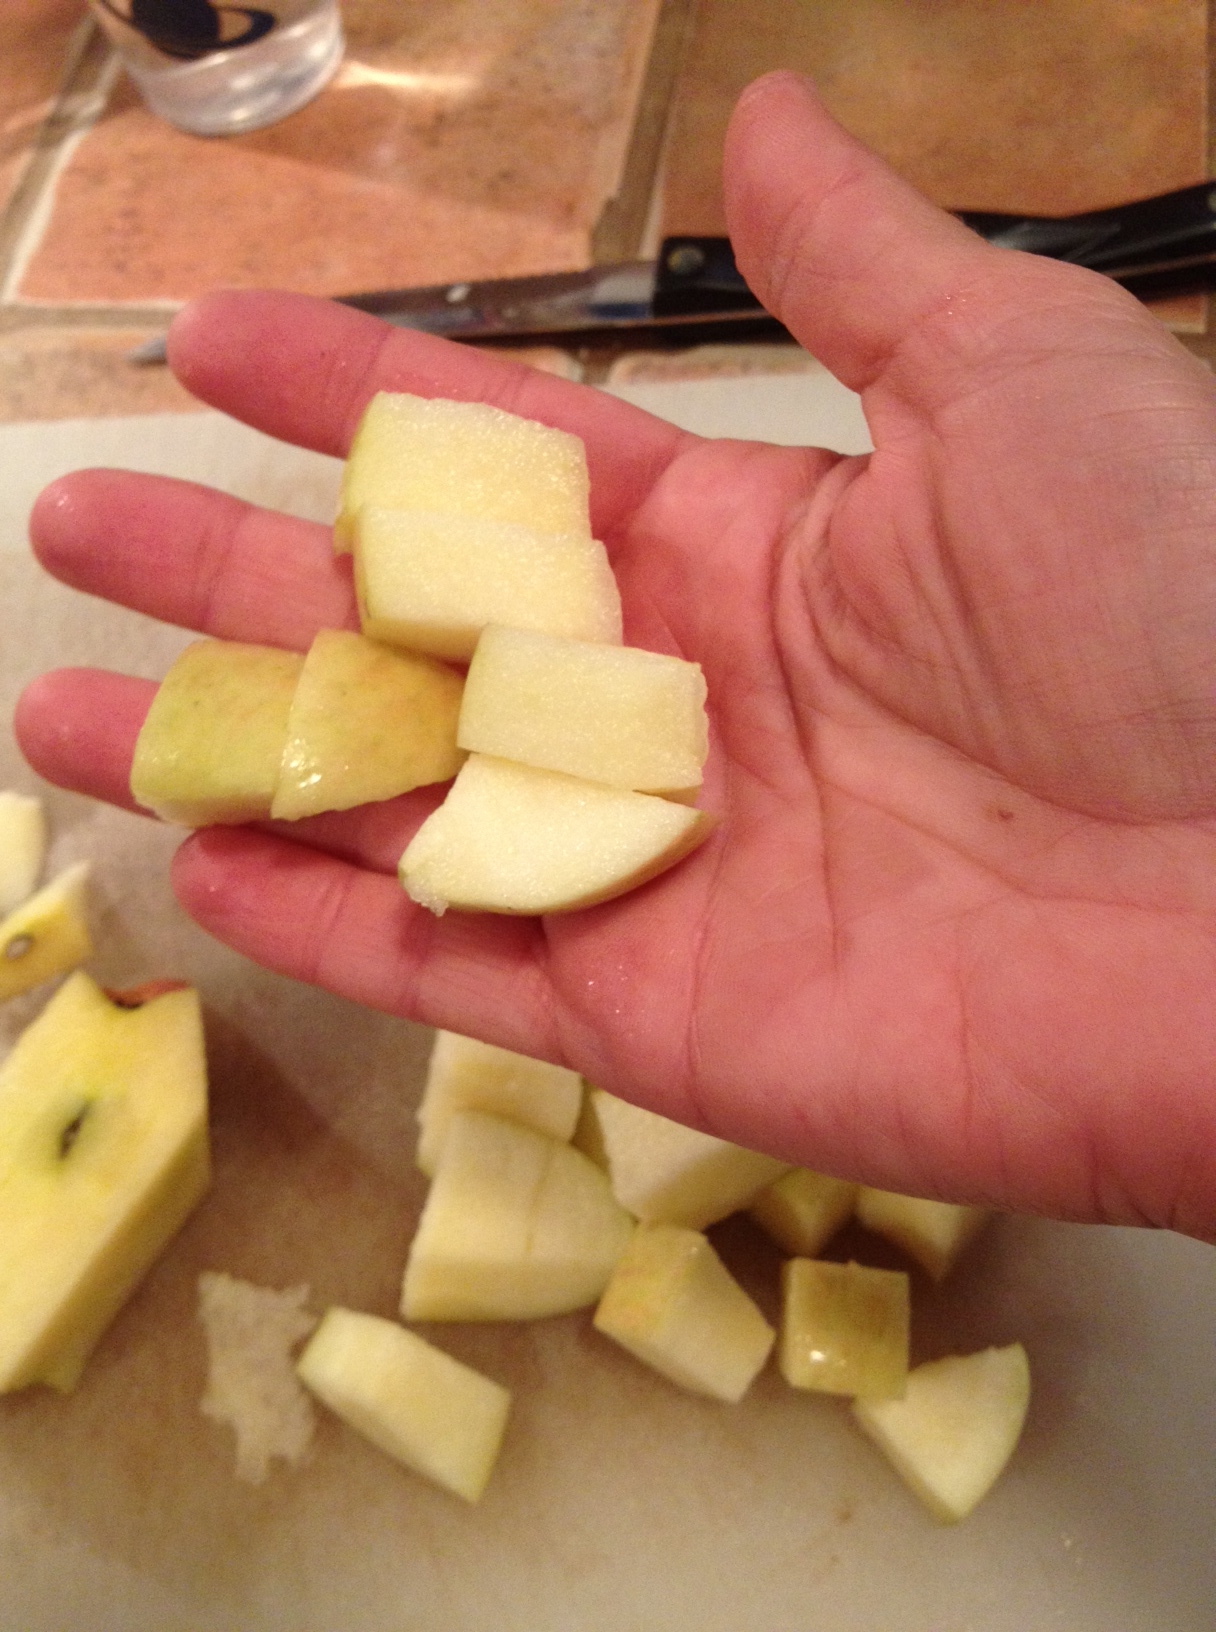
In the summer, there’s nothing (NOTHING) better than a ripe red tomato in a salad.  But in the winter there’s nothing (NOTHING) more disappointing than a white, cakey tomato in a salad.  Don’t do it!  Yes, you need something acidic to make your salad truly del-ish, but there are many better winter options than a lackluster tomato! Even with So-Cal’s year round produce scene, options are still seasonal.   Try a tart apple, fresh or canned sliced pears, or what I used in this bowl of yum: some fresh oranges.

Another winter salad secret of mine is craisins.  Yum!!!  These tart and tangy little garnet gems (they seriously do look like jewels, don’t they?) are the perfect complement to my almost-done masterpiece.

craisins

My kids are well-trained (hello–I hope so!) to eat a good salad, but prefer it without cheese or red onion.  So I usually toss theirs with a balsamic vinaigrette, serve them, and then add the rest for the grownups.  I adore thinly sliced red onion in pretty much any kind of salad, and I also like a dash of cheese.  In this salad I used a mild and salty crumbled feta.  Parmesan or goat cheese could also have worked.   If I use pears, I sometimes like a mild blue cheese.

People who enjoy my salads often get annoyed when they discover that I usually mix the dressing right on top as I go.  “How can I recreate that Michelle!?”  I like a few dashes of balsamic vinegar, olive oil, garlic salt, pepper, sugar, sometimes mustard, sometimes honey, sometimes apple cider vinegar, sometimes celery salt…  (Sorry.  That’s not helpful; it’s annoying.  I think you get the picture…)

I promise to post some actual salad dressing recipes soon.  Honestly, though, when you’ve got so much good stuff in your bowl, a simple vinegar and oil (my general go-to) dressing from a bottle can do just fine too.

Drum roll please… Tah-dah!

salad

Some tips: Add the juice from oranges or pears to the dressing: yum!  This salad was served as part of a meal, but you can make your salad the main dish by adding some protein and maybe some bread or crackers on the side.  My preferred protein pals include chopped chicken, chickpeas, kidney beans or fresh nuts (walnuts, pecans=smile.)  Candied nuts taste marvy, but pack on the calories, so I usually just use plain.

Get creative with your salads.  My mom likes chopped cauliflower and broccoli in hers.  Sometimes we don’t even include lettuce or other leafy greens.  Gasp!  I know.  Shocking.

Two Cooks in the Kitchen

“Cooking” means different things to different people.  
Teri 
To my girlfriend, Teri (who measures her cream before placing it into her coffee each morning and is pictured, here, enjoying something I made one day), recipes are comforting guidelines to be followed to the letter.  Teri reads recipes as valuable documents, carefully crafted maps upon which the traveler  shall comfortably drive.  This is why Teri loves baking.  Measuring.  Sifting.  Following procedure and order brings rhythm and relaxation into Teri’s time in the kitchen.  Predictable outcomes.  Ahhh

To me, recipes are more like, uh, “suggestions.”  Recipes are lists of possible ingredients in recommended quantities with an endless array of outcomes.  Recipes are rough sketches that need not be followed if the artist is not in the mood.  Having to follow a recipe to the letter causes my breathing to become labored.  This is why I avoid baking whenever possible.  Measuring.  Sifting.  Being forced to follow procedure and order brings panic into Michelle’s kitchen time.  Predictable outcomes.  AHHH!!!!

I would like to state that Teri and I have found ways to coexist–even co-create–happily in the kitchen together.  Give us our six combined kids, a good bottle ‘a wine and stand back.  I would also like to mention that Teri has, thanks to my influence, developed a looser grip on her measuring implements and even occasionally whips things up now with a “pinch of this” and a “spot of that.”  It could be the wine though too.  No.  It’s my influence.
 
Not surprisingly, Teri makes the best milk chocolate chip cookies in the universe (with an equal number of chips in each one.)  Generally someone who likes to share, Teri has locked this recipe in the vault.  If you want to try a chocolate chip delight, check out Teri’s new business venture Red Door Sweets. Even if you’re not in the mood for a cookie, this stylish webpage is worth a quick visit just to brighten your day!

Oh Yeah…

oatmeal

Oatmeal.  At our house we love a good bowl of oatmeal.  I shall emphasize the “good” in that sentence, as it is crucial to the positive  oatmeal experience.

I like pretty much all foods that enter my mouth to varied in texture, a bit complex and bursting with flavor.  The lovely portrait of oats you see pictured above is “Coaches Oats” with brown sugar, raisins, walnuts and pecans.  Splash some milk on top and gimme-some’a-that!

I have some old-fashioned Quaker oats in my pantry (it’s on the bottom shelf so you couldn’t see it on the “heart” photo post the other day) but these  are reserved for baking.  Sorry Mr. Quaker guy, but your oats just don’t cut it in a bowl ’round here.

two oats

I discovered steel-cut oats (small can) several years ago and I must say, they changed my oatmeal outlook big time.  Steel cut oats have a nutty, textured taste.  They can take up to 45 minutes to cook though, so, you know, ya gotta have a good plan in place.  Whenever I make them, I make up a pretty big pot so we can have them for a few days.  Sometimes, when I’m feeling really crazy, I even freeze them for a future defrost.

I know.  Now that’s crazy.

More recently I stumbled upon “Coaches Oats” which is a whole grain oatmeal I’m able to pick up at Costco.  These little honeys cook up right-quick and have almost the same nutty-ish taste and fuller texture that my peeps know and love in their morning bowl.

I’m not trying to plug any brands here, but I do recommend a whole grain oat if you’re going to make anything at all.  “Whole grain” means that the hull–which contains all the fiber and most of the nutrients–has not been removed from the grain.

My husband likes his oatmeal with raisins, brown sugar and a spoonful of natural peanut butter mixed in.  I don’t know if feeding this concoction to your husband will make him as dashingly good-looking as mine is, but you could try and let me know.

Criss-Cross

Homemade Apple Sauce

Right now at local farmer’s markets and in supermarkets, apples are in season!  My kiddos, likes lots of kiddos, like a good bowl of apple sauce.  I started making my own when my first was a baby.  It was the first homemade baby food I ever made!  I make it now because I can buy delicious, locally grown, organic apples from the ugly bin at a hugely marked down price (sometimes even 80 cents per pound!), cut out the random bad spot, and whip up a BIG pot of yum.

Making your own apple sauce is obviously a tad more time-consuming that opening a jar from the store, but it’s super easy, the result is very worth the effort.

Step 1: Cut your apples into cubes, removing any offending spots.  I leave the skins on.

step 1

Step 2: place your apple cubes into a cooking pot and add water until just over 1/2 of the apples are covered.  When the apples cook down, they will add a lot of liquid, and you don’t want the sauce too runny.  (If it does look too runny after boiling, you can drain a bit of the liquid before blending.)

step 2

Step 3: Heat until boiling and then simmer until the apples are soft enough to mash.  How long you ask?  Sorta depends how many apples you’ve got in your pot.  After they are boiling I test mine after about 10 minutes simmering.

Step 4: Mash those babies up!  I use one of my favorite kitchen gadgets that I can’t even remember the name of… At our house we refer to it as “the wand.”  I like it because I can stick this vicious little blade right in the pot, push the button and wah-lah.  You can use an electric mixer or even a blender though if you don’t have a magical-vicious-blade-wand like mine. (By the way–this doohicky is from Target.  Nothing fancy.)

step 3

Blend it until it looks like, uh, apple sauce.  In case you’ve never seen apple sauce before (I want to meet you.  Where in the world are you from?) here’s a photo I took and may as well use!

step 4

Step 5: ENJOY!

step 5

Tips: I also blend up some of this yum if I’ve purchased apples that taste mealy (I hate that, don’t you?) or have been sitting in my fruit bowl long enough to look sad.  Cold apple sauce is a great snack on a summer’s afternoon, and warm apple sauce is dreamy for breakfast in the winter.

I typically make sauce with 4 or 5 pounds at a time, to make the effort worth it.  It keeps fine in the fridge for days (if it lasts) and can be frozen for longer storage.

Pears or strawberries (if you have some lying around) can also be thrown in and will make the sauce even sweeter.  The berries don’t need to cook for more than two or so minutes.

Final tip (still with me?): This is a great kids-help-in-the-kitchen recipe for my 7 and 8 year-olds (5 year old soon!)

The “Joye” of Cooking

teriyaki chicken

So I’ve been sorta-kinda posting on MWF (OK, technically this is only my second week with that schedule, but must we split hairs?)   Today, in case you’re not aware, is Thursday, but last night my girlfriend, Joye, found out about a chicken dish I was preparing.  She said it sound delicious and couldn’t wait to see the recipe.

Apparently flattery will get you everywhere with me ‘cuz here you go (Joye!)

Michelle’s  Very Own Hawaiian-Teriyaki Chicken

Ingredients:
Whole cut-up (organic if you like) chicken
1 can crushed pineapple in juice
3/4 cup brown sugar
1/4 cup low sodium soy sauce
1/4 cup balsamic vinegar
tsp. garlic powder

Directions:
Set oven at 350 degrees.  Pour soy sauce and garlic powder in the bottom of a baking pan.  Place chicken upside down to coat with sauce/powder mixture and then flip over.  Pour pineapple over chicken.  Add a shake of garlic powder over top.  Crumble brown sugar over top of pineapple and then drizzle with vinegar.  Bake uncovered for one hour or until done.   Broil top for a couple of minutes to create a nice crusted glaze over top of chicken.

Tips: you can use whatever chicken you have around (thighs, breasts, whatever.)  Brown sugar, soy sauce and vinegar measurements can be adjusted for smaller quantities, in fact I don’t even measure, just sorta eye-ball and pour until it looks right.  You want about a quarter inch of liquid in the pan when it cooks.  Add a dash of orange (or pineapple) juice if there isn’t enough.  The sauce from the meat tastes super-yum over steamed brown rice…  Oh, and you can substitute cubed or round-cut pineapple, just drain some of the extra juice before pouring.

Bonus Tip: The best thing about this recipe is that I always have the ingredients on hand and can whip it up in a NY minute.  And, yes, the title of this post was a no-brainer. 🙂

p.s. (geeze, shut up already, Michelle!) this recipe is also posted on the “meat” section of my recipe page.  OK.  I’m done.  For real.